
Page History
Because of compatibility issues, the On older Hyper-V image cannot be imported in older Windows Server versions.However, you can use the following server versions you might encounter issues while importing the iDNA Applications virtual machine.
The following steps describe a workaround:
- Extract the file panagenda_idnaapplications_hyperv_vhd.7z
- Start Hyper-V Manager
- Right-click on your server and select “New -> Virtual Machine”
- Click Next on “Before you Begin” screen
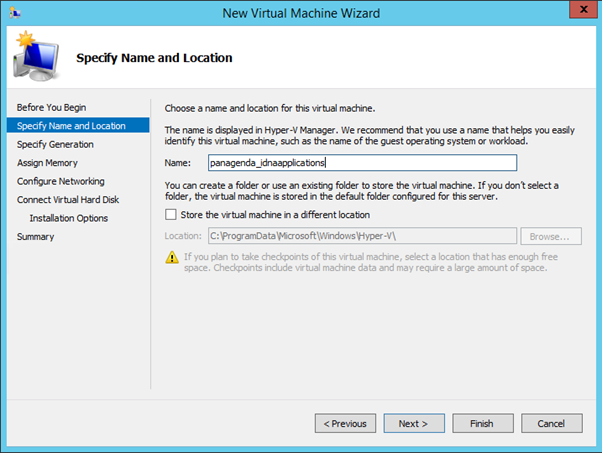
- Enter a name for the virtual machine, e.g. panagenda_idnaapplications
- Select Generation 1 on the “Specify Generation” screen
- Specify the startup memory on the “Assign Memory” screen -> minimum required are 8092 MB
- Specify a network connection -> e.g. Default Switch
- On the Connect “Virtual Hard Disk” screen select Use an existing virtual hard disk
- Select the the virtual hard disk file from the panagenda_idnaapplications\Virtual Hard Disks directory
- On the “Completing the new Virtual Machine Wizard” click Finish to create the virtual machine