Page History
| Table of Contents |
|---|
| Anchor | ||||
|---|---|---|---|---|
|
| Anchor | ||||
|---|---|---|---|---|
|
| Anchor | ||||
|---|---|---|---|---|
|
This guide will help you to set up panagenda GreenLight in no time! If you have any comments or suggestions, please contact us at support@panagenda.com.
| Anchor | ||||
|---|---|---|---|---|
|
| Anchor | ||||
|---|---|---|---|---|
|
...
Easy setup with near zero maintenance effort requirements
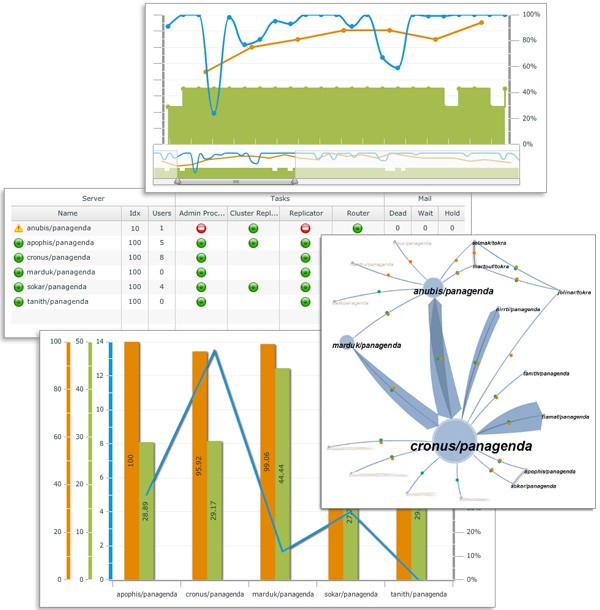
Live monitoring dashboard in tabled format and a dynamic topology map
Enterprise scalable data collection
Built-in reporting environment - no need to have comprehensive Excel skills or do frustrating data collection and transformation
Historic data is available anytime for in depth reporting and incident analysis
Export reports as image and PDF - the collected data is never converted into just
images but always at your fingertips
Easy analyzing of database information - makes security audits or simply health checks so much more efficient
Flexible alerting
| Anchor | ||||
|---|---|---|---|---|
|
| Anchor | ||||
|---|---|---|---|---|
|
| Anchor | ||||
|---|---|---|---|---|
|
| Anchor | ||||
|---|---|---|---|---|
|
Trial Hardware Requirements:
...
Additional resources may be required under all above described conditions, depending on data collection intervals, number of sensors enabled, and number of servers being monitored. panagenda and selected panagenda GreenLight business partners can help you evaluate the optimum hardware specifications for your environment.
| Anchor | ||||
|---|---|---|---|---|
|
| Anchor | ||||
|---|---|---|---|---|
|
Operating System:
panagenda GreenLight comes as a VMWare appliance including its own operating system based on the popular CentOS Linux distribution. The requirements on the underlying operating system running the VMWare server solution depend on the chosen VMWare product. The panagenda GreenLight appliance runs with VMWare Player, Workstation, Server, ESX, ESXi and vSphere as host system. Detailed information about operating system requirements can be found on the VMWare product page of the selected product: www.vmware.com/products/
HCL Domino Notes:
A HCL Domino Notes user ID with access to the servers that are to be monitored and read access to at least one public names and address book on these servers is required.
For a more detailed analysis of historic performance data, read access to the HCL Domino log.nsf database may be required.
Depending on mail flow tracking and tracing, reader or author access is required for all mail router boxes (mail.box) and editor access for dedicated mail-in databases. For replication monitoring, application design and database content analysis, the respective HCL Notes user ID requires read access to the respective applications and documents.
For detailed HCL Domino server monitoring, Release 4.5.x or higher of the Domino Server is required.
User ID Requirements:
panagenda GreenLight requires a IBM Domino Notes User ID to access your Domino infrastructure. The ID´s password must be set to "greenLightUseOnly" (case sensitive!). You can set another password in the backend configuration file ramkin-config.properties (see GreenLight Administrator's Guide). The ID must have access to all the servers that should be monitored by panagenda GreenLight.
Network Access:
Company Network
The appliance must be able to reach the monitored servers via a TCP/IP network and must be reachable via web browser to access the panagenda GreenLight Web Interface.
Internet
For automatic license and software updates, panagenda GreenLight requires access to the internet. Alternatively, panagenda GreenLight can be updated via update packages that are installed via file upload to the panagenda GreenLight appliance. To acquire those packages for manual update please contact support@panagenda.com.
| Anchor | ||||
|---|---|---|---|---|
|
| Anchor | ||||
|---|---|---|---|---|
|
Operating System and Software Requirements:
As for hardware, panagenda GreenLight´s Web Interface is available on any operating system supported by HTML5.
Browser Security and Network Access:
No special web browser security settings are required to run the panagenda GreenLight Web Interface. To store login information, permission to save flash cookies is required.
To access the panagenda GreenLight Web Interface, you need to have access at least to the panagenda GreenLight appliance via TCP/IP, Port 80 (HTTP) and Port 443 (HTTPS).
| Anchor | ||||
|---|---|---|---|---|
|
| Anchor | ||||
|---|---|---|---|---|
|
panagenda GreenLight is developed as a virtual appliance:
| Anchor | ||||
|---|---|---|---|---|
|
| Anchor | ||||
|---|---|---|---|---|
|
- CentOS 7.3
panagenda GreenLight is based on the very popular CentOS Linux distribution, which is based on the source code of Red Hat Enterprise Linux (RHEL). CentOS 7 was chosen because of its stability and its long time support (Maintenance until June 2024). It uses a current kernel version (3.10.x) for virtual systems. Only security patches are configured for automatic update via the YUM (yellowdog updater modified).
- Docker 17 CE
- Docker Compose 1.11
- Tomcat 8 Application Server
- NodeJS 6 Application Server
- Nginx 1.11 Reverse Proxy Server
- Java 8 Virtual Machine
- PostGreSQL 9.6 Relational Database Server
- A sub-set of Domino 9.0.1 Linux 64 Bit binaries
| Anchor | ||||
|---|---|---|---|---|
|
| Anchor | ||||
|---|---|---|---|---|
|
| Anchor | ||||
|---|---|---|---|---|
|
| Anchor | ||||
|---|---|---|---|---|
|
| Anchor | ||||
|---|---|---|---|---|
|
| Anchor | ||||
|---|---|---|---|---|
|
Contact panagenda(via website: www.panagenda.com/en_uk/contact or email: office@panagenda.com) or one of our business partners to acquire the following two files:
- greenLight2.ova is a VMWare-specific file
- greenLight2.lic is your panagenda GreenLight license file. Place it in a folder on your local hard drive. This file will be uploaded to the virtual appliance in a later step using the panagenda GreenLight Web Interface.
| Anchor | ||||
|---|---|---|---|---|
|
| Anchor | ||||
|---|---|---|---|---|
|
- Start VMWare Player or VMWare Server
- Open Virtual Machine
- Navigate to the folder where the greenLight2.ova is located
- Select the file greenLight2.ova
| Anchor | ||||
|---|---|---|---|---|
|
| Anchor | ||||
|---|---|---|---|---|
|
| Anchor | ||||
|---|---|---|---|---|
|
Open VMWare ESX, ESXi or vSpere and select:
...
- Source: Specify the location where you saved the GreenLight OVM file on your hard drive - for example: C:/Temp/GreenLight290.ova
- OVF Template Details: In this step you can inform yourself about the GreenLight version you are about to deploy. When you are done, just click on Next
- Name and Location: Is the next relevant step for deploying GreenLight. We recommend to name this template "panagenda GreenLight 2"
- Storage: Then you have to select a destination storage for the virtual machine files.
- Disk Format: In this step, please select the format you want to store the virtual disks. We recommend to choose "Thick Provision Eager Zeroed"
- Network Mapping: Then select the network the deployed GreenLight template should use.
- Ready to Complete: In the final step you are shown the options you set up. Click on Finish if you are satisfied with you setting to start the deployment task.
| Anchor | ||||
|---|---|---|---|---|
|
| Anchor | ||||
|---|---|---|---|---|
|
| Anchor | ||||
|---|---|---|---|---|
|
| Anchor | ||||
|---|---|---|---|---|
|
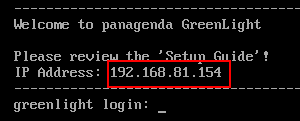
After starting up the appliance for the first time, you should be presented with a panagenda GreenLight welcome screen. If your network has a public DHCP server available, the system might already have acquired an IP address and will display the URL. Use the shown IP address (interface URL) in your web browser to connect to the panagenda GreenLight web interface. If DHCP is not available within your network or the panagenda GreenLight appliance did not acquire any IP address, you have to configure the panagenda GreenLight appliance network settings (see "Network Settings:" on page 13).
| Anchor | ||||
|---|---|---|---|---|
|
| Anchor | ||||
|---|---|---|---|---|
|
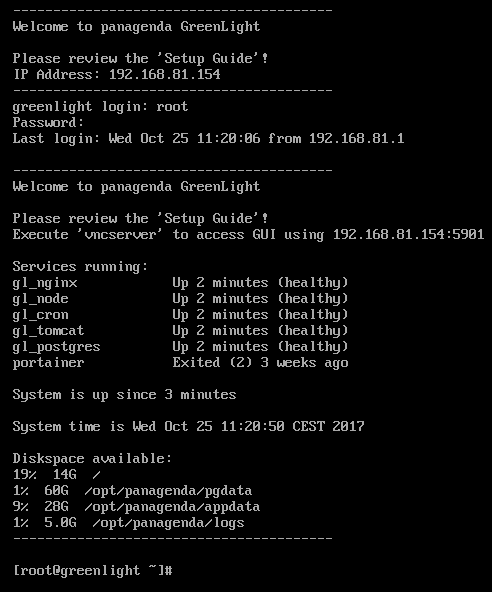
GreenLight provides a console and a graphical user interface in order to configure operating system level settings like network, time and time zone settings.
Default login information:
user "root" with password "config"
| Anchor | ||||
|---|---|---|---|---|
|
| Anchor | ||||
|---|---|---|---|---|
|
After login, basic information, such as disk space, system time and IP address, are shown:
| Anchor | ||||
|---|---|---|---|---|
|
| Anchor | ||||
|---|---|---|---|---|
|
There are two ways to use the GUI to configure your GreenLight appliance:
Local
In order to start the GUI locally (Vmware Console), enter the command "startx"
To start the GUI automatically when GreenLight is booted, please enter the following command: "systemctl set-default graphical.target"
Remote Access via VNC
Please note that remote VNC access is only possible if the GreenLight appliance received an IP address via DHCP.
...
To check an established internet connection, a web browser (Mozilla Firefox) is available on the panagenda GreenLight appliance. You can use the terminal window to check if your TCP/IP connection is established, using Linux ping and ifconfig command. For more information about ping and ifconfig commands, type man ping or man ifconfig in the terminal console window. panagenda GreenLight log files can be found within the /opt/panagenda/logs directory. The main log file (/opt/panagenda/logs/tomcat/greenlight.log) holds essential information about panagenda GreenLight runtime behavior. Use the Files app to navigate to these log files. To check the panagenda GreenLight appliances system behavior, you can use the installed system monitor.
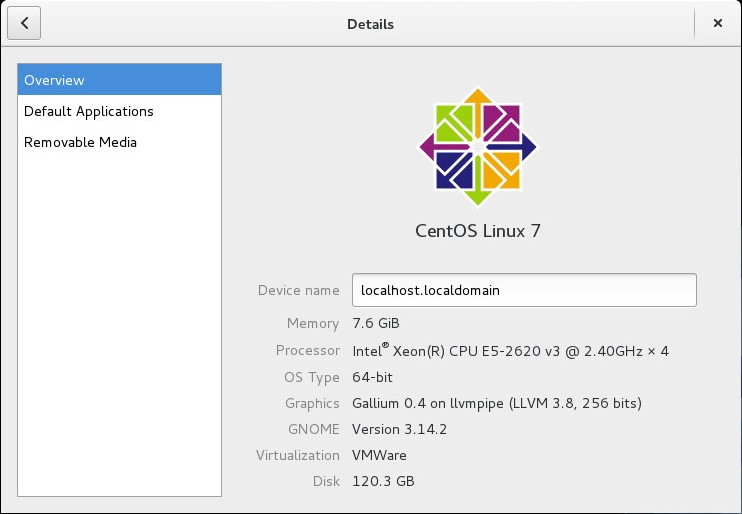
Network Settings:
To change the IP address and DNS configuration please click on the Network icon. Select the Ethernet connection and click on Edit:
...
When changing the host name (default is "GreenLight") in the Host Information application, please make sure to adapt the host alias properties for 127.0.1.1 in /etc/hosts. This can be done using the gedit application. It is recommended that both host name and full qualified domain name are entered here:

Time Zone Settings:
Please check the time zone settings of the appliance, use the Time and Date application to adjust.
| Info |
|---|
|
CORS Setting
Please modify the following file and enter your GreenLight Server CORS config
- Open a console window and enter: vim /opt/panagenda/appdata/gl/config
- add: PANAGENDA_CORS_ALLOWED_ORIGINS=your_GL_URL
- example: PANAGENDA_CORS_ALLOWED_ORIGINS=https://gl-dev-01.panagenda.local
- Save/close by entering: hit ESC + :wq!
- enter: gl down
- enter: gl start
| Anchor | ||||
|---|---|---|---|---|
|
| Anchor | ||||
|---|---|---|---|---|
|
To connect to the panagenda GreenLight Web Interface, you have to enter the host IP address of the appliance (see "Welcome Screen and IP Address" on page 10) or its hostname (FQDN; see "Network Settings:" on page 13) into your web browser's address bar.
panagenda GreenLight uses HTTPS for secure communication between its appliance and its Web Interface, so you have to accept the security certificate, to go on.
| Info |
|---|
|
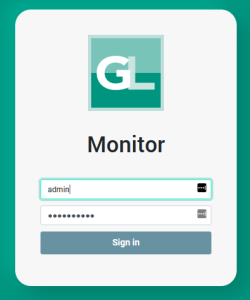
Login:
panagenda GreenLight uses an internal account management to support different user roles and access levels for different monitoring tasks. By default a user with administrative credentials is available to access the panagenda GreenLight Web Interface.
Default user login information
- Username: admin
- Password: greenLight
Please keep in mind, that panagenda GreenLight access control and account management implements the following security restrictions:
...
Every time you log into the panagenda GreenLight workspace, you can choose from a list of languages used within the Web Interface. If your preferred language is not available, contact your local panagenda GreenLight administrator for other language packages on hand.
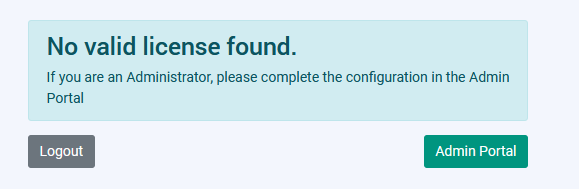
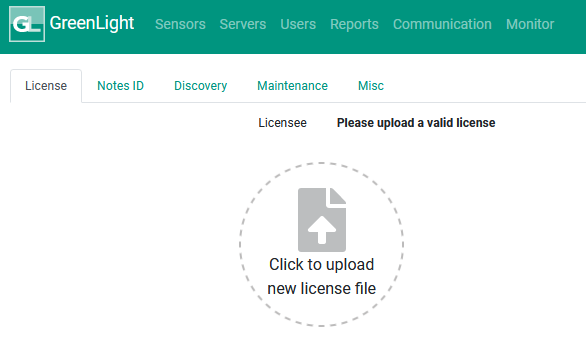
panagenda GreenLight License:
If you connect to your panagenda GreenLight appliance the first time, you will be asked to upload your panagenda GreenLight license file (see "Obtaining panagenda GreenLight" on page 9).
...
| Info |
|---|
|
| Anchor | ||||
|---|---|---|---|---|
|
| Anchor | ||||
|---|---|---|---|---|
|
After uploading a License File, it is a mandatory step to upload a Notes ID for GreenLight.
...
| Info |
|---|
|
| Anchor | ||||
|---|---|---|---|---|
|
| Anchor | ||||
|---|---|---|---|---|
|
| Anchor | ||||
|---|---|---|---|---|
|
...
| Anchor | ||||
|---|---|---|---|---|
|
After filling the required (or desired information) into the form, you can start your domino network discovery. Depending on your network and settings, the duration of the discovery can vary. If it is over,
The panagenda GreenLight Domino network discovery is fully cluster aware and creates special cluster nodes to monitor and display special cluster information.
| Anchor | ||||
|---|---|---|---|---|
|
| Anchor | ||||
|---|---|---|---|---|
|
You can add any device to your panagenda GreenLight monitoring environment for example if you would like to add your Domino server manually or devices couldn't be found by the Domino network discovery scan (for example non-domino-servers, printers, routers).
...
You can enter any network Host Name or IP address of an existing network device. After that, you can check, if a Domino Server runs on your device. In case of that, the Domino Server Name will be entered in the corresponding field.
You can select a Network Authority in this dialog as well (see "Network Authority" on page 25). In addition you can set a Location, Time Zone and a Separator Format.
If you click on next, you can define the business hours and maintenance periods (see "Business Hours and Maintenance Periods" on page 24).
If you click further on next, you can specify mail recipients by severities per host.
| Anchor | ||||
|---|---|---|---|---|
|
| Anchor | ||||
|---|---|---|---|---|
|
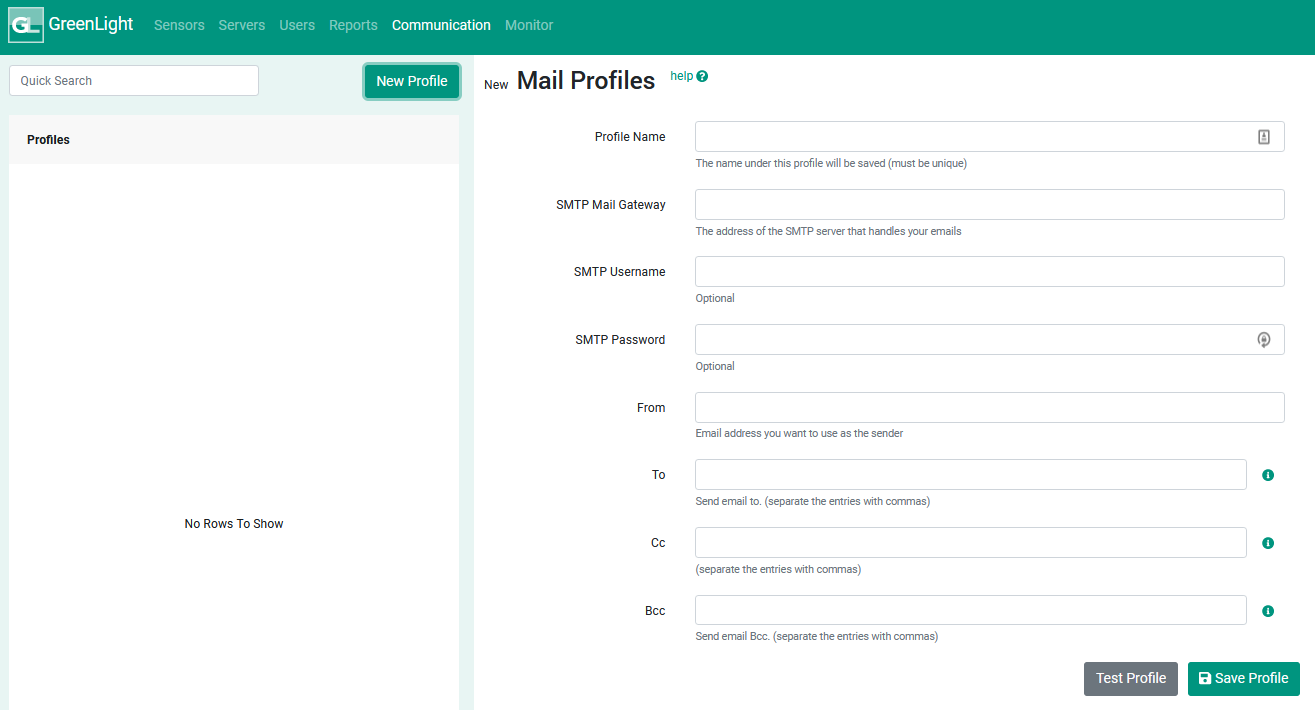
Here you can define a SMTP mail receiver. Type in at least the required information to the appropriate field to be able to save it, what makes the profile available under SMTP Mail Actions.
| Anchor | ||||
|---|---|---|---|---|
|
| Anchor | ||||
|---|---|---|---|---|
|
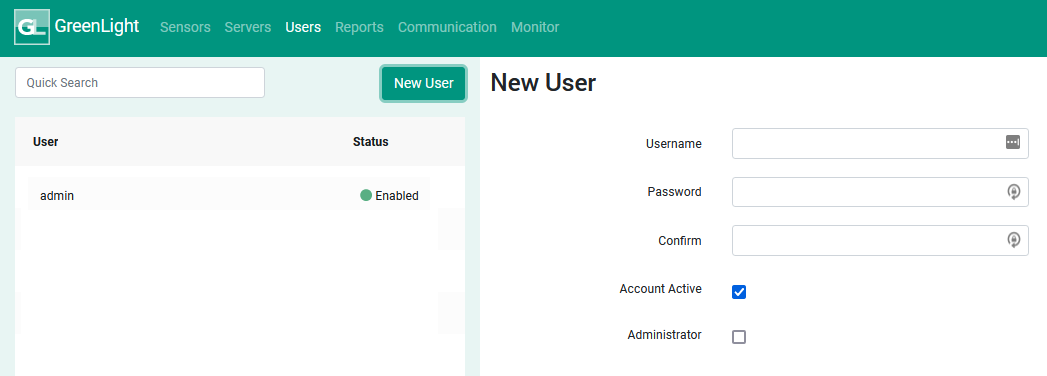
If you wish to use panagenda GreenLight from multiple workstations at the same time, please create as many users as required using this form. Specify a Login Name, a Password and in addition, if this account should be active from now on and if the user should get administrator rights.
| Anchor | ||||
|---|---|---|---|---|
|
| Anchor | ||||
|---|---|---|---|---|
|
| Anchor | ||||
|---|---|---|---|---|
|
| Anchor | ||||
|---|---|---|---|---|
|
In order to enable access to the Linux GUI, a VNC server is pre-installed on the GreenLight appliance. To start the VNC server, please follow these steps:
...
| Info |
|---|
|
| Anchor | ||||
|---|---|---|---|---|
|
| Anchor | ||||
|---|---|---|---|---|
|
Please refer to the following article in our kbase: {*}https://www.panagenda.com/kbase/x/dY-o*
| Anchor | ||||
|---|---|---|---|---|
|
| Anchor | ||||
|---|---|---|---|---|
|
In order to adjust the IP ranges for Docker, please perform the following steps:
...
- Save/close
- afterwards execute the following command:
gl customize
| Anchor | ||||
|---|---|---|---|---|
|
| Anchor | ||||
|---|---|---|---|---|
|