![]()
Page History
Depending on your environment you may need to enlarge the virtual disk on which ApplicationInsights stores its data on.
...
| Note |
|---|
Please note that all virtual disks have to be located on the same physical storage. Please also note that extending disk space ALWAYS means that you have to add a new disk on virtual hardware level. I. e. extending disk space never means enlarging existing disks. |
| Table of Contents |
|---|
Extending VMWare Disk
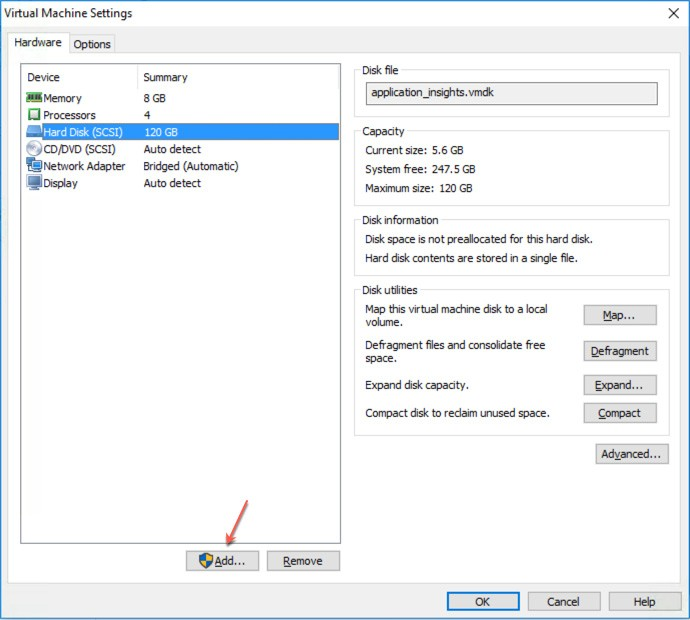
 Extending Extending the virtual disk is done using the VMWare host application. Here are examples for VMWare Workstation and vSphere:
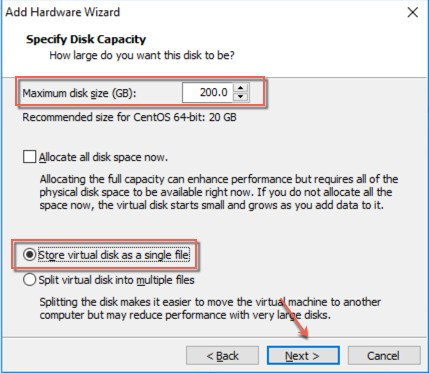 Please
Please restart the virtual appliance after adding the new disk.
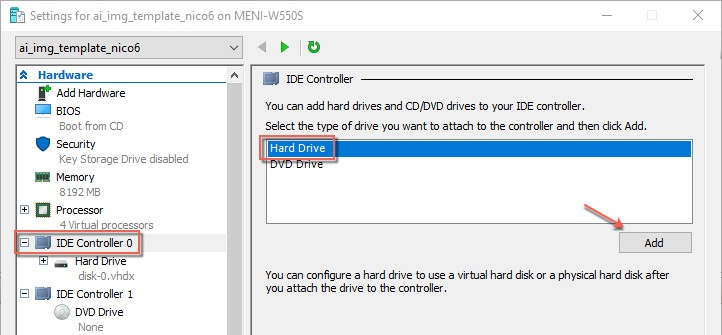
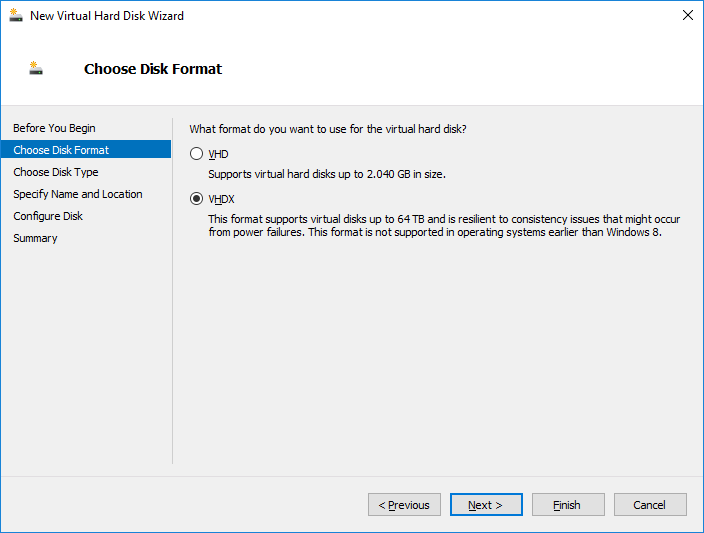
Extending Hyper-V Disk
To extend the virtual disk, open the virtual machine properties and follow the steps below:
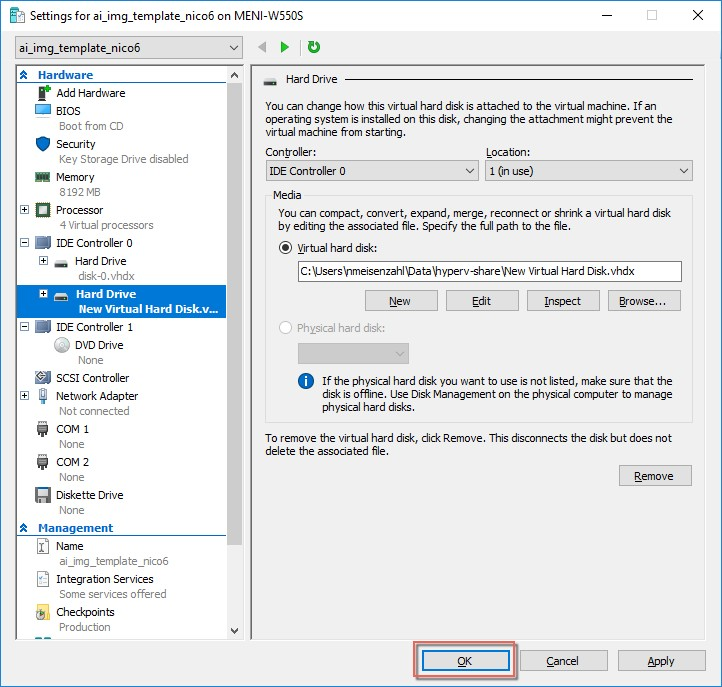
- Navigate to IDE Controller 0, select Hard drive and click Add:
...
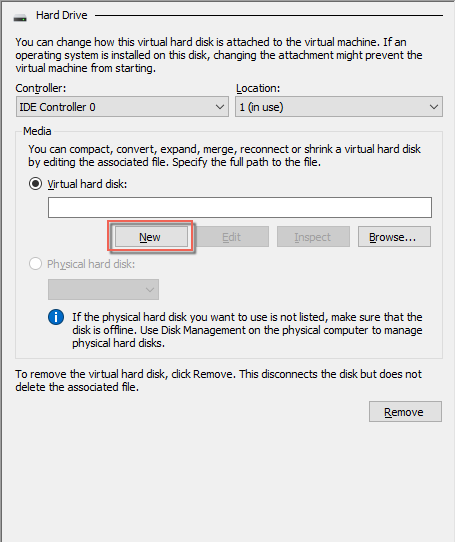
 Select Select New and finish the wizard:
- After finishing the wizard click Ok to exit the Settings:
Please restart the virtual appliance after adding the new disk.
Enlarging the Partition in the ApplicationInsights Appliance
- The easiest way to enlarge a partition in ApplicationInsights is to use the installed partition manager GParted. Please launch it using the Applications menu (you can also start GParted from the Terminal with "sudo gparted"):
- Select the new physical disk:

...
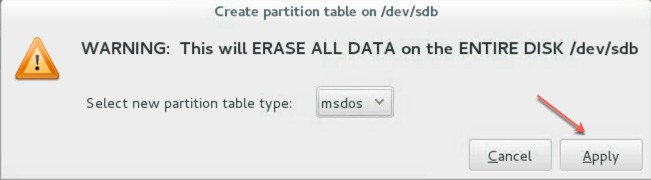
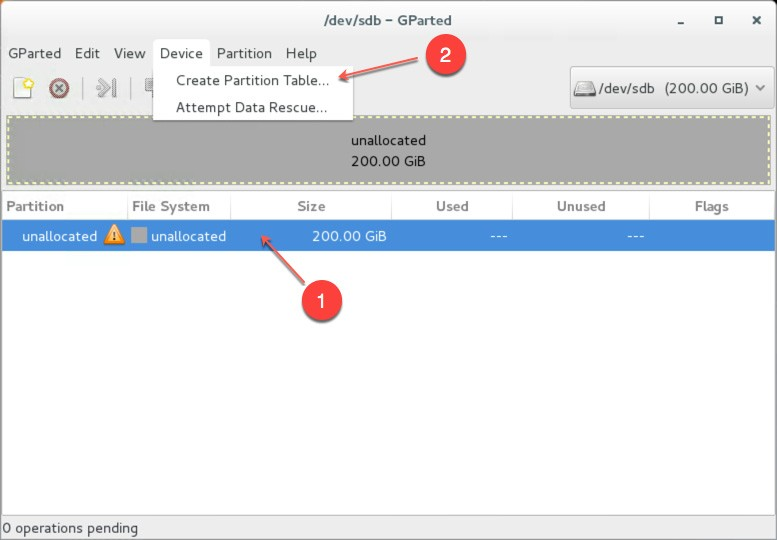 Select Select the unallocated space, open the Device menu and on click on Create Partition Table:
- Click on Apply in the warning:
...
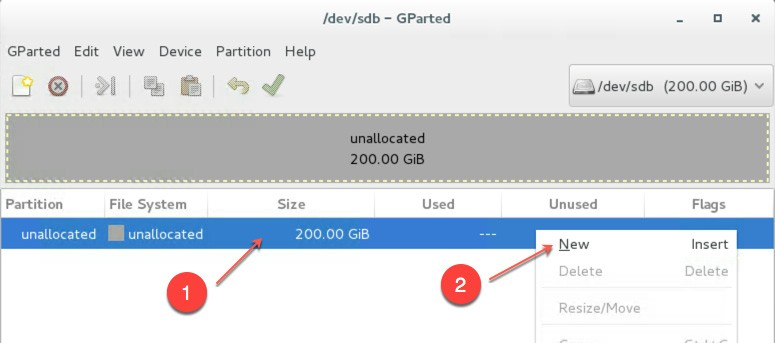
- Select the new unallocated space, right-click and select New:
...
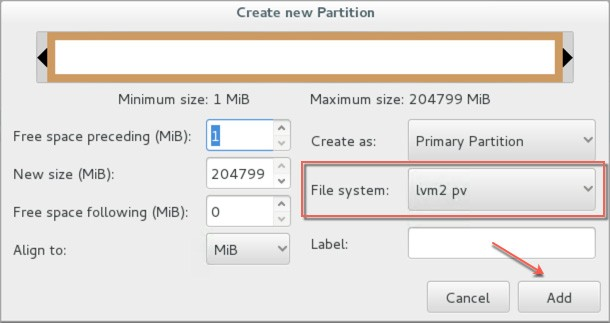 From the Create as drop down menu, select Primary Partition and chose lvm2 pv as File system (if needed, a Label can be defined):
- Save your changes by clicking the apply button - also on the popup message
...
- Start the Logical Volumes Manager from the Applications menu
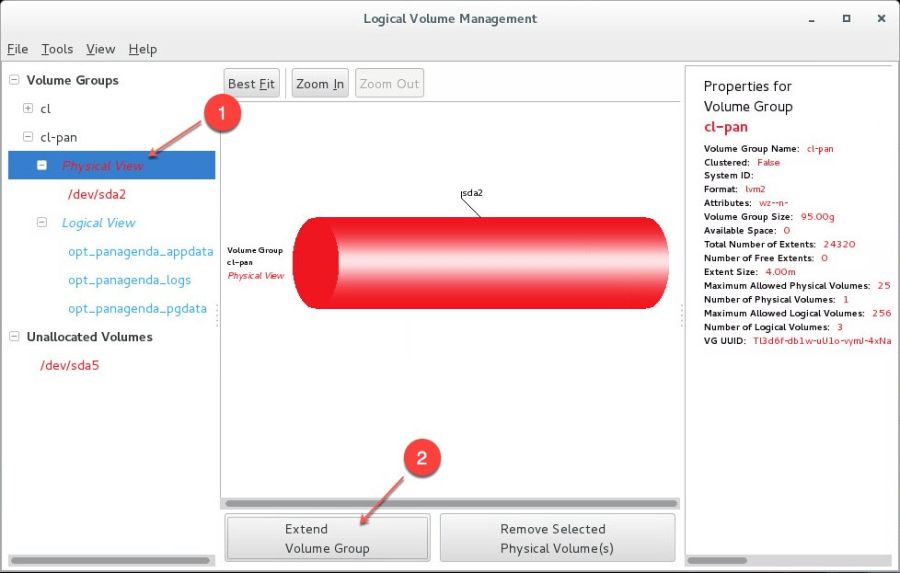 Open Open the Logical View on the left hand side, select Physical View and click Extend Volume Group:
...
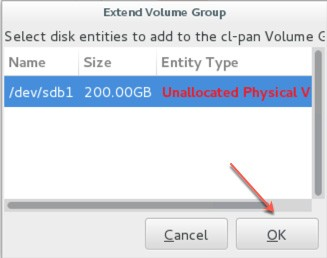
- Select your new volume and click OK:
...
...
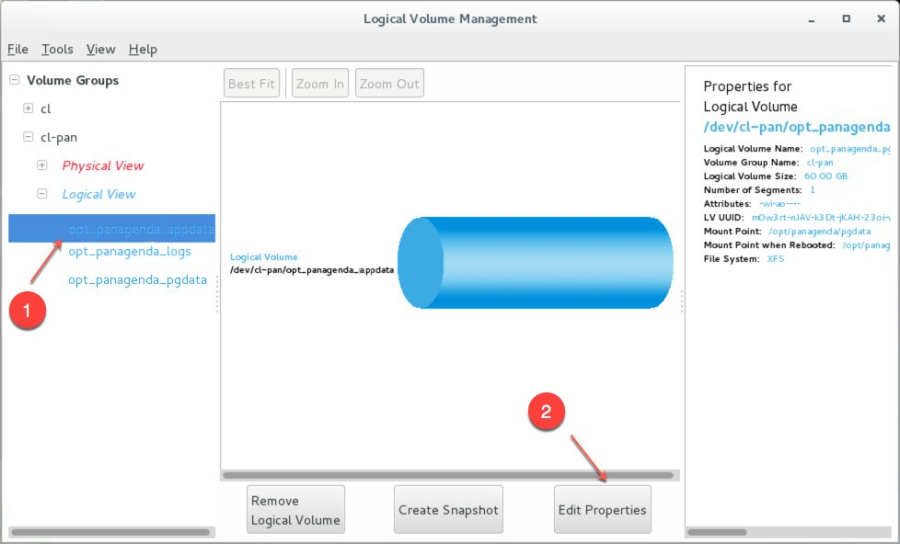
- After this, select the logical volume opt_panagenda_appdata:
...
...
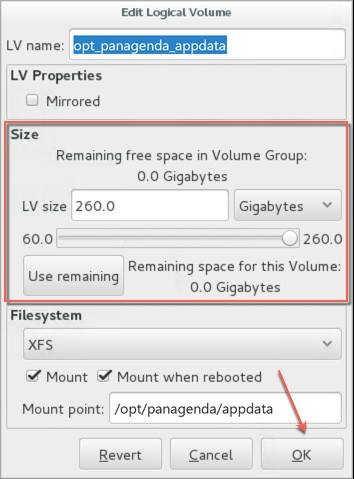
- Resize the logical volume as needed (initial dimensioning: 5MB x database instances
...
- - for more details, please refer to the Setup Guide):
 '
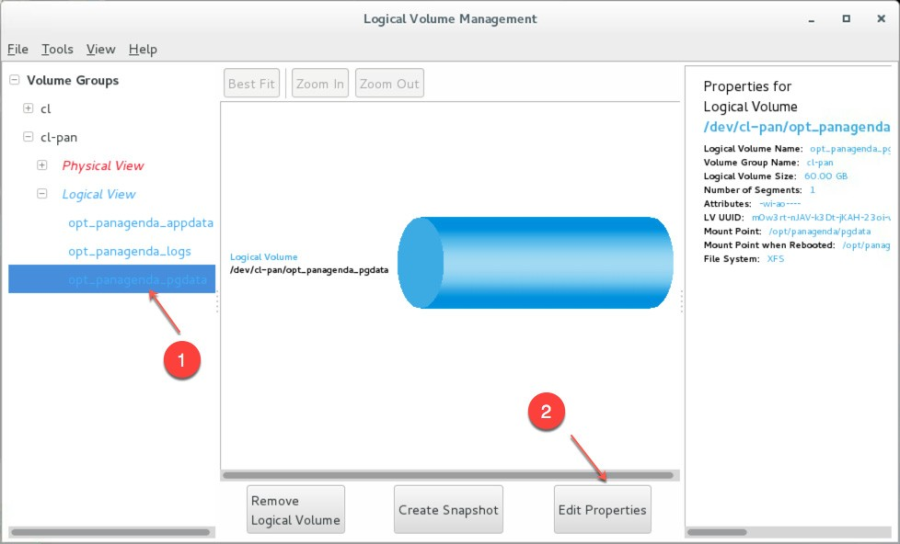
' - Select the logical volume opt_panagenda_pgdata (for
...
- more details on initial dimensioning, please refer to the Setup Guide):
...
- Resize the logical volume as needed (see step 12)
...
| Info | ||
|---|---|---|
| ||
You can repeat this enlargement whenever you need more space. |