
Page History
| Note |
|---|
Please contact sales@panagenda.com to get the license and the latest versions of the following files for iDNA Applications: |
- panagenda_idna_applications_vmware_esx.ova – image file directly deployable via the VMWare vSphere client. It holds the iDNA Applications virtual appliance in open virtualization format (OVF)
- panagenda_idna_applications_hyperv_vhd.7z – 7z archive which contains the iDNA Applications virtual appliance in Microsoft Hyper-V format
We recommend running iDNA Applications production systems in a VMWare vSphere/ESX enterprise environment. An additional option is VMWare Workstation which is mainly targeted at temporary evaluation environments and are not supported for production use.
Place the license file (*.lic) in a folder on your local hard drive. This file will be uploaded to the virtual appliance in a later step using the panagenda iDNA for application web interface.
Launching iDNA Applications using virtualization software:
| Table of Contents |
|---|
Recommended: VMWare vSphere/ESX via OVA
Open VMWare ESX, ESXi or vSphere and select: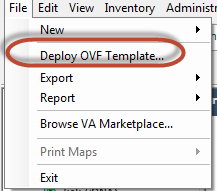
The Deploy OVF Template dialog will open:
- Source: Specify the location where you saved the iDNA Applications OVA file on your hard drive – for example: C:/Temp/panagenda_idna_applications_vmware_esx.ova
- OVF Template Details: In this step you can inform yourself about the iDNA Applications version you are about to deploy. When you are done, just click on Next
- Name and Location: Is the next relevant step for deploying iDNA Applications. We recommend to name this template "panagenda iDNA Applications"
- Storage: Then you have to select a destination storage for the virtual machine files.
- Disk Format: In this step, please select the storage format for the virtual disks. We recommend to choose "Thick Provision Eager Zeroed"
- Network Mapping: Then select the network the deployed iDNA Applications template should use.
- Ready to Complete: In the final step you are shown the options you set up. Click on Finish if you are satisfied with your setting to start the deployment task.
Alternative: Microsoft Hyper-V
- Extract the file panagenda_idna_applications_hyperv_vhd.7z
- Start Hyper-V Manager
- Right-click on your server and select "Import Virtual Machine" from the context menu

- Click Next on "Before you Begin" screen
- Select the folder that contains the extracted files and click Next
- Select the iDNA Applications image
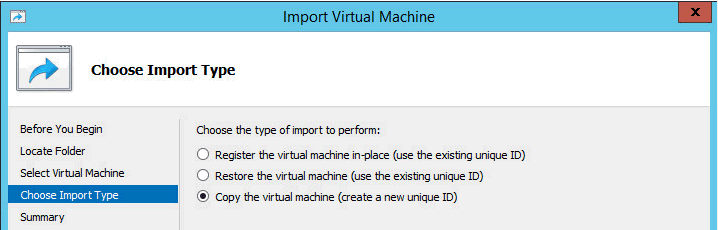
- Select "Copy the virtual machine (create a new unique ID)"
- Click Next in the "Choose Destination" screen, unless you want to set the folders individually
- Select the folder where you want to store the virtual hard disk
- Click Next int the "Configure Processor" step – please don't change the processor settings
- Specify a network connection
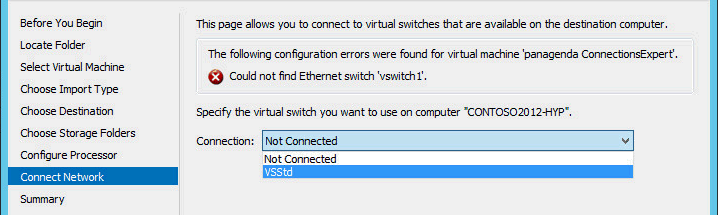
Select Finish on the summary screen to start the copy
Alternative: VMWare Workstation/Player via VMX
- Start VMWare Workstation
- Open Virtual Machine
- Select the file panagenda_idna_applications_vmware_esx.ova