The form for creating a Mailbased Install also allows to create a "PostOpen" Script for inclusion in e.g., the mailfile template or an application that users use on at least a daily basis:
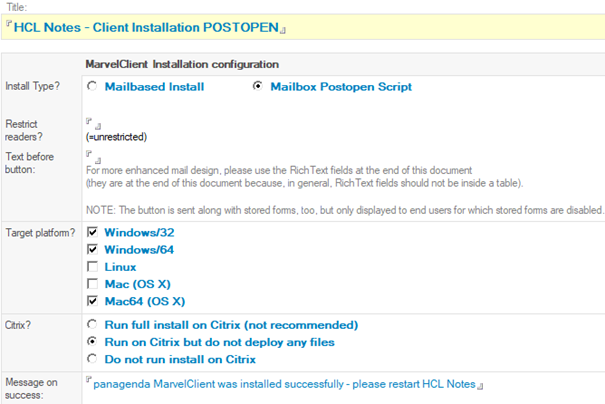
On the form, simply select the "Mailbox PostOpen Script" option. When you are finished with completing the form, select the overhead menu item "Generate PostOpen Script" and follow instructions in the remarks at the top of the generated code. You can use the button ‘Copy to Clipboard & follow the instructions in green’ to copy the code into your clipboard.
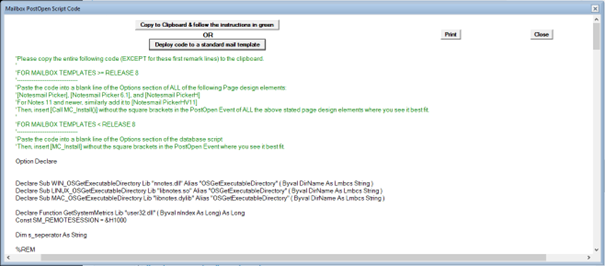
Should you want to embed the code into a different database (e.g., the phone book application or similar that all end users access on ideally a daily basis or even more often), then you can simply paste the code into Code\Database Script of that application and insert MC_Install into the PostOpen section.
You can also add the code to the Database Script and PostOpen event of bookmark.ntf on client deployments, if you do not have a central database that all your end users access frequently. In this case, you would have to deploy the code to all bookmark.ntf files across your clients (for multiuser setup, don't forget the MUI subfolders) and trigger a design update by deleting TemplateSetup from notes.ini.
After closing the document, you can return to it and re-use it any time to update the configuration and code if needed.
NOTE that when you update the configuration, you must also update the code in the corresponding database/template.
Second option to automatically deploy the “PostOpen” script code into your environment.
There is a second option available to automatically deploy the "PostOpen" script code into your environment. This method can be used if you are using a standard HCL Notes mail template or if your modified HCL Notes mail template still has the following standard unchanged design elements (pages): "[Notesmail Picker]", "[Notesmail Picker 6.1]", "[Notesmail PickerH]", and "[Notesmail PickerHV11]".
To use this option, click the "Deploy code to a standard mail template" button and a dialog will appear prompting you to enter the following details:
- The ‘Source template path’ of your existing HCL Notes mail template.
- The ‘Target template path’ to create the new mail template.
- The ‘Target master template name’ of the newly created mail template.
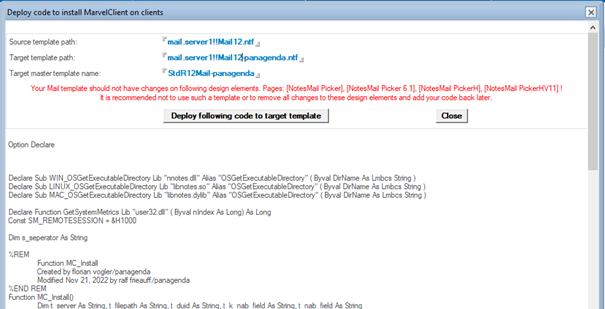
This method also works locally if the HCL Notes mail template is in your local Notes data directory. Simply omit the server name when entering the source and target paths.
Once you have correctly filled in the three fields, click the "Deploy following code to target template" button. If you are confident with the details you entered, click "Yes" to confirm the process.
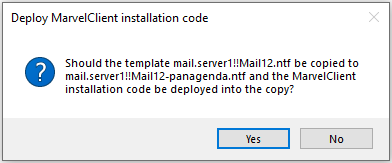
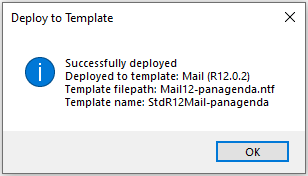
The source HCL Notes template will then be copied which will be indicated in a process bar, and the script code will be implemented in the named pages of the new template. On success, you will receive a dialog indicating that a new HCL Notes mail template has been created and can be found at the named location.
HINT: you may want to sign the new template or just the changed pages with your server or special signer ID.
The template is now ready to use, but to make it available for all users, you must replicate the template to all your Mail servers. If you have created the new template in your local Notes data directory, you will need to replicate the template to your mail servers as well.
Now you have created a new template and replicated it to the mail servers. Next, you want the users' mail databases to get the new template:
HINT: Before you deploy the new template to all mail databases you should carefully test the template on one or a few mail databases:
You can either initiate Replace Design per mail database and test the new template or
change the ‘Template name’ per mail database. In the example from ‘StdR12Mail’ to ‘StdR12Mail-panagenda’.
But the best way to deploy the created Mail template is the use MarvelClient as described in the following article 'Automate replace design of your user’s mail databases'
NOTE: As always, test thoroughly before implementing. Your users will thank you!