OfficeExpert EPM Client Installer deployment via Microsoft Intune
Step 1: App Information
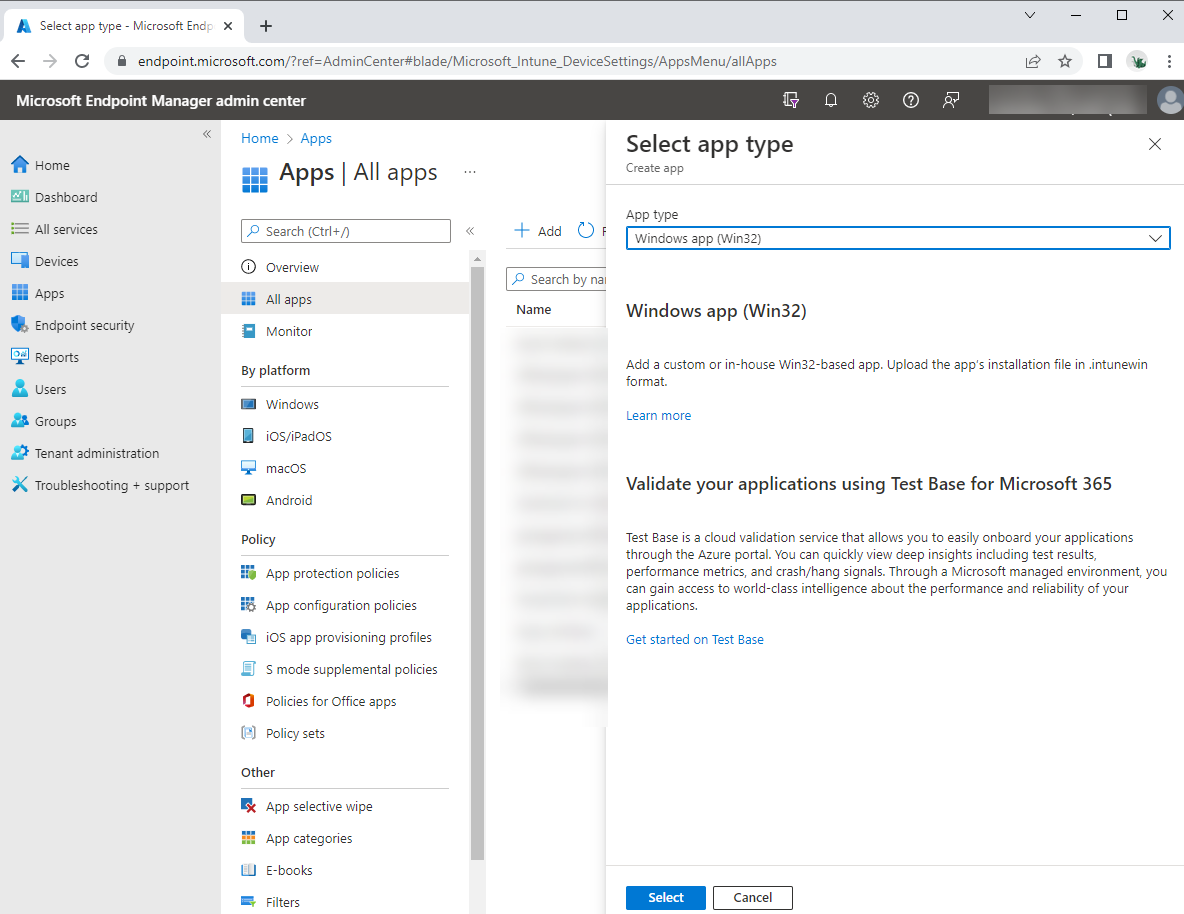
- Sign in to the Microsoft Endpoint Manager admin center.
- Select Apps> Windows > Add.
- On the Select app type pane, select Windows app (Win32).
- Click Select. The Add app steps appear.
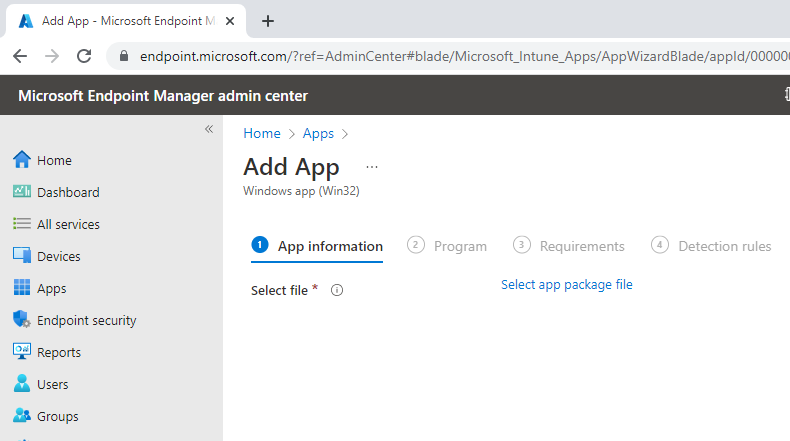
- On the Add apppane, click Select app package file.
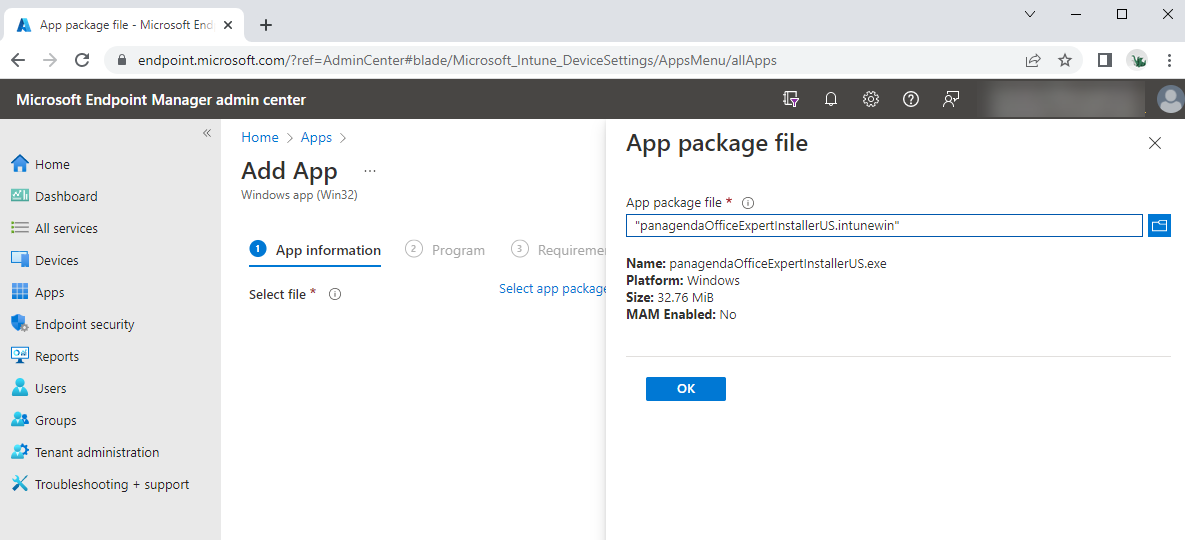
- On the App package file pane, select the browse button. Then, select the location where you have stored the panagenda-provided Intuneinstallation file with the extension .intunewin. The app details appear.
- When you're finished, select OK on the App package file
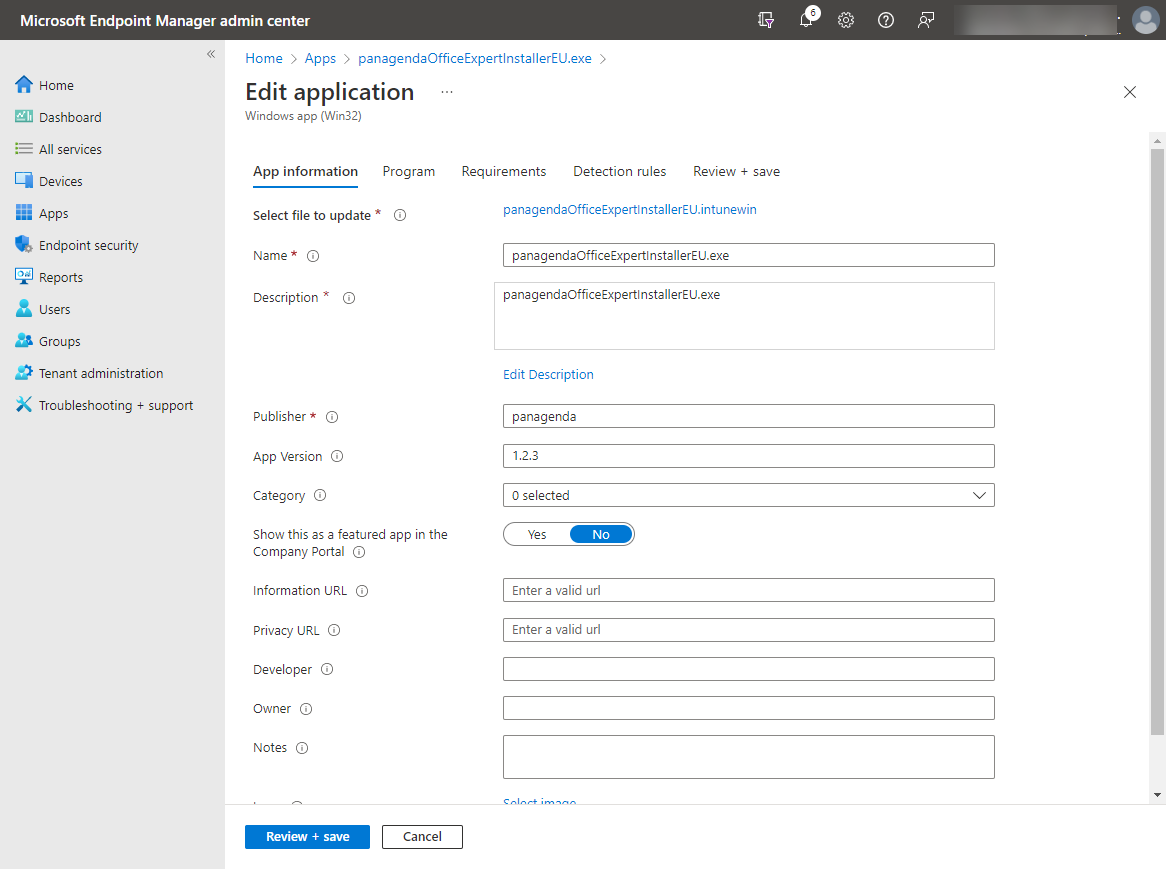
- On the App information page, add the details for your app. Some details will be already filled in for you; do not change the prefilled info.
- Name: This will be filled in for you
- Description: This will be filled in for you
- Publisher: Enter panagenda Inc.
- App version: This is the Installer Version number of EPM. This version is not the same like the EPM App Version (Store app)!. Currently this is v1.2.5
- Category: Leave blank
- Show this as a featured app in the Company Portal: Leave this as No
- Information URL: Leave blank
- Privacy URL: Leave blank
- Developer: Leave blank
- Owner: Leave blank
- Notes: Leave blank
- Logo: Leave blank
- Select Next to display the Program page.
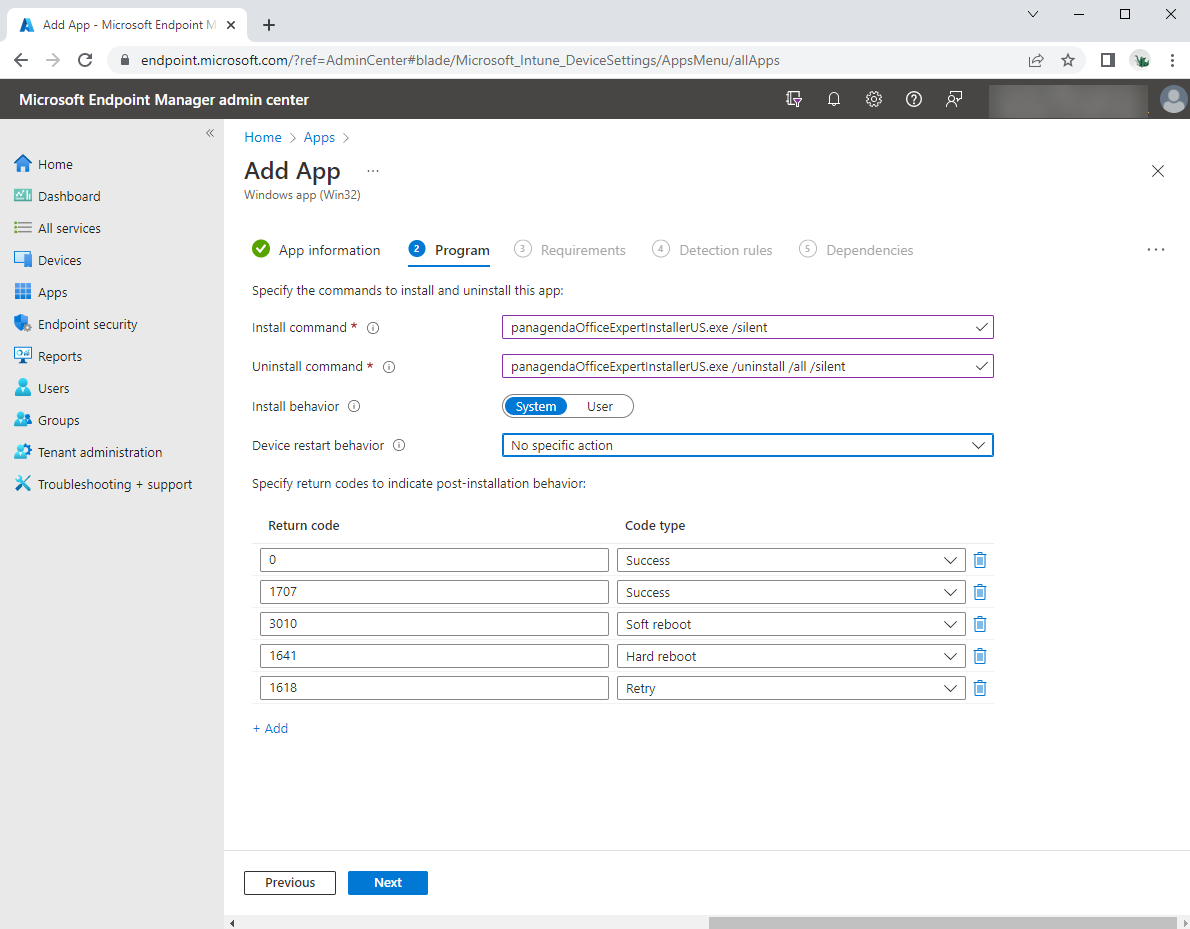
Step 2: Program
- On the Program page, configure the app installation and removal commands for the app:
- Install command: depends which EPM datacenter you use (EU or US):
for EU customers, enter: panagendaOfficeExpertInstallerEU.exe /silent
for US customers, enter:panagendaOfficeExpertInstallerUS.exe /silent
- Uninstall command: depends which EPM datacenter you use (EU or US):
for EU customers, enter: panagendaOfficeExpertInstallerEU.exe /uninstall /all /silent
for US customers, enter: panagendaOfficeExpertInstallerUS.exe /uninstall /all /silent
- Install behavior: Leave this set to System
- Device restart behavior: Select No specific action
- Specify return codes to indicate post-installation behavior: Leave the values that are already filled for you
- Select Next to display the Requirements page.
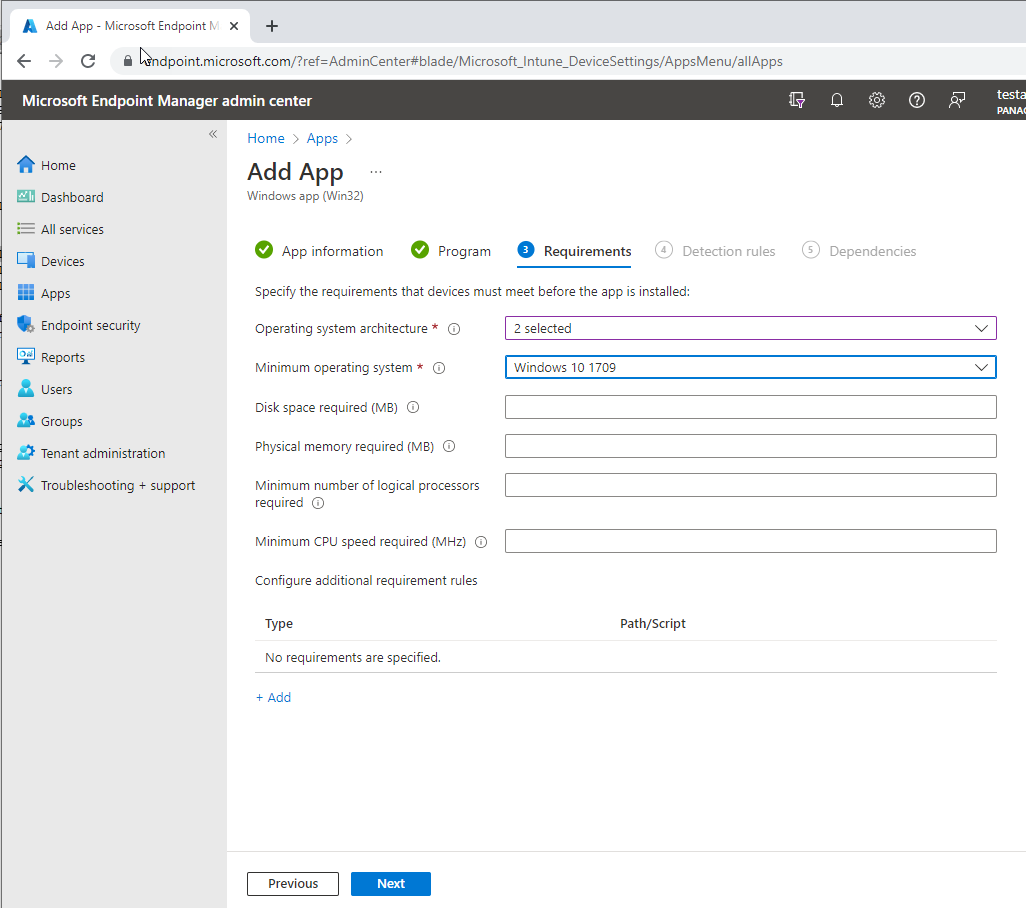
Step 3: Requirements
- On the Requirements page, specify the requirements that devices must meet before the app is installed:
- Operating system architecture: Select both 32-bit and 64-bit
- Minimum operating system: Select Windows 10 1709 (This may change when Microsoft ends support)
- Disk space required (MB): Leave blank
- Physical memory required (MB): Leave blank
- Minimum number of logical processors required: Leave blank
- Minimum CPU speed required (MHz): Leave blank
- Configure additional requirement rules: Leave blank
- Select Next to display the Detection rules page.
Step 4: Detection Rules
On the Detection rules pane, you will configure the rules to detect the presence of the app.
- Rules format: Choose to Manually Configure Detection Rules
- Click Add
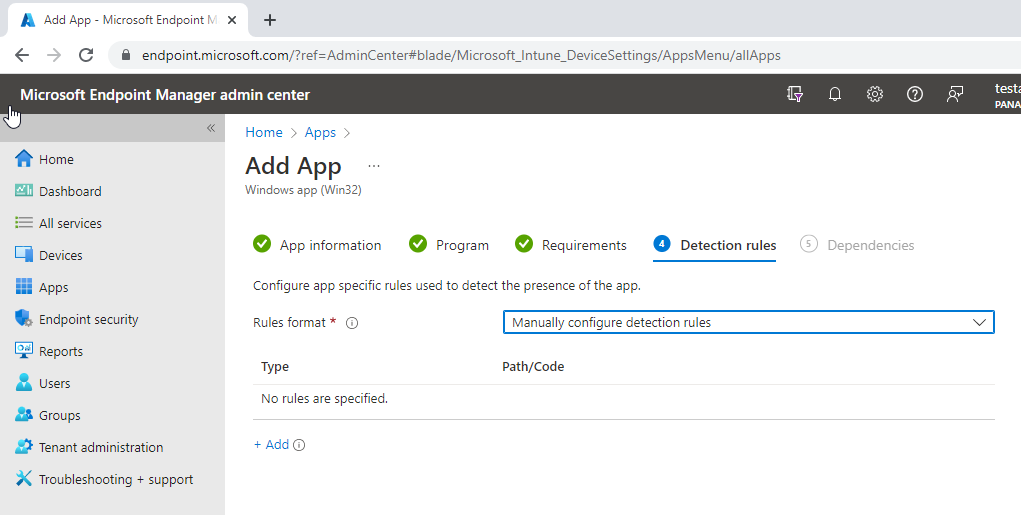
- Configure the detection rule as follows:
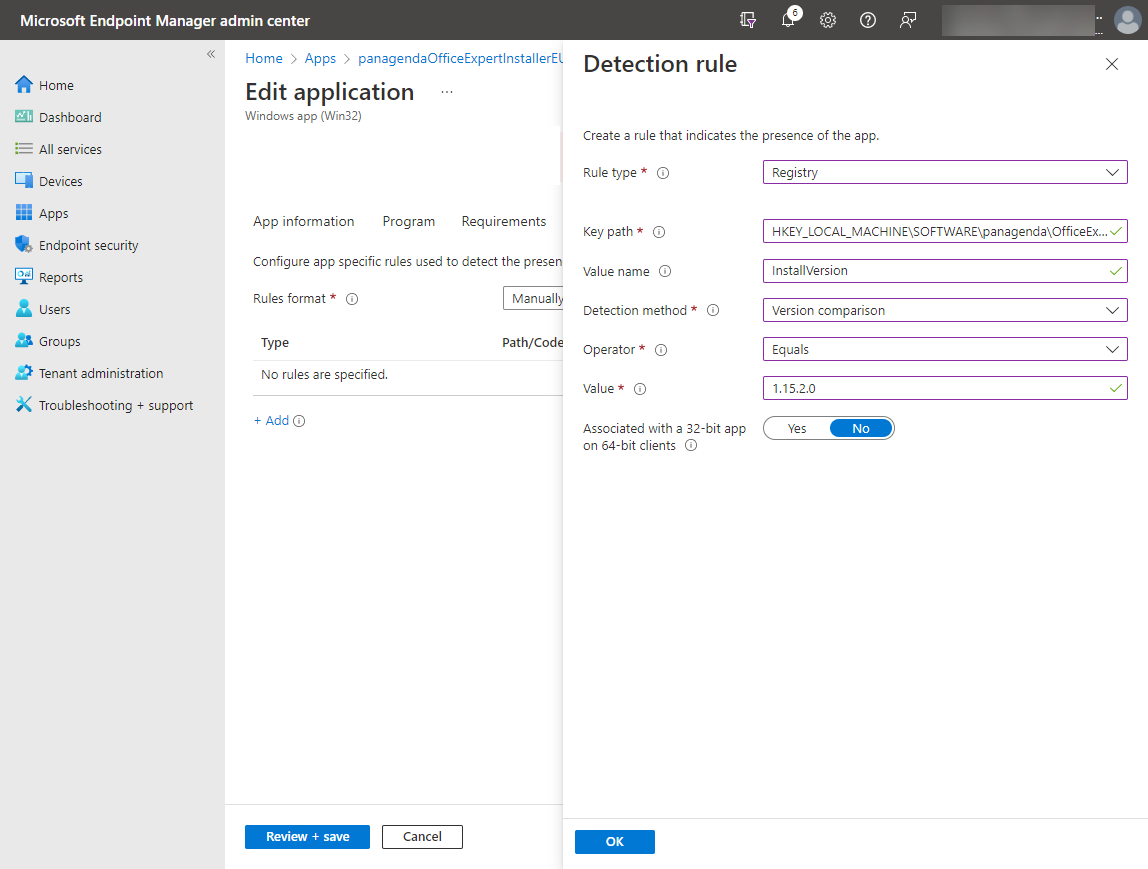
- Rule Type: Choose Registry
- Key path: Enter HKEY_LOCAL_MACHINE\SOFTWARE\panagenda\OfficeExpert
- Value Name: Enter InstallVersion
- Detection method: Choose Version comparison
- Operator: Choose Equals
- Value: the EPM Agent Version which is part of this Installer Version → e.g. 1.16.7.0
- Associated with a 32-bit app on 64-bit clients: Select No
- Click OK
- Rule Type: Choose Registry
Now keep clicking Next until you get to the Assignments page. There is nothing to configure on the Dependencies or Supersedence pages.
Step 5: Assignments
Select your desired groups and/or users to receive the app as you normally would.
Click Next and Review and Create your app.