Depending on your environment you may need to enlarge the virtual disk on which ConnectionsExpert stores its data on.
Please note that all virtual disks have to be located on the same physical storage. Please also note that extending disk space ALWAYS means that you have to add a new disk on virtual hardware level. I. e. extending disk space never means enlarging existing disks.
Extending VMWare Disk
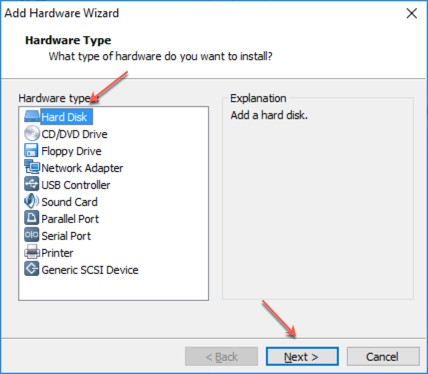
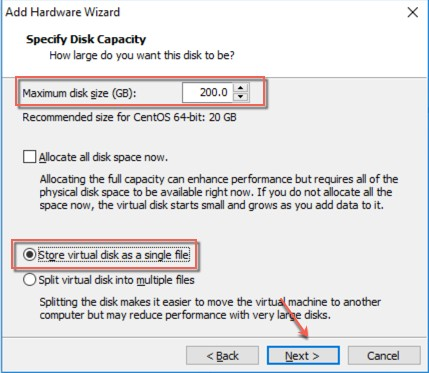
Extending the virtual disk is done using the VMWare host application. Here are examples for VMWare Workstation and vSphere: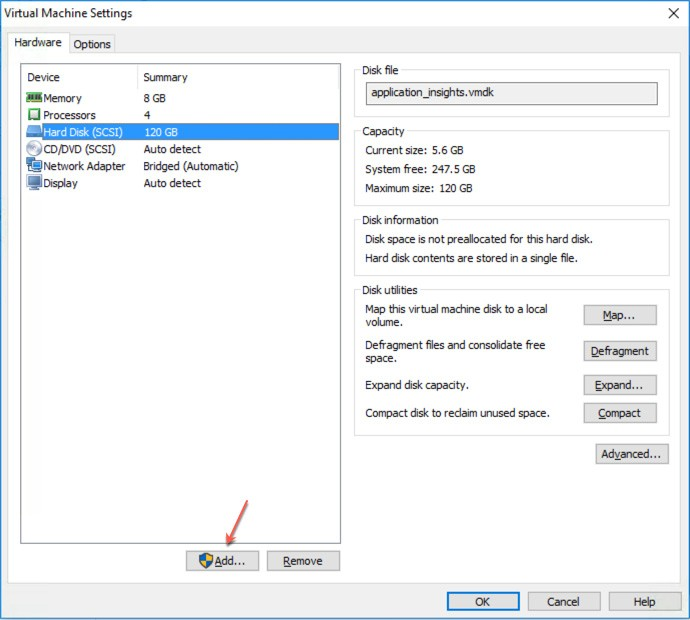
Please restart the virtual appliance after adding the new disk.
Extending Hyper-V Disk
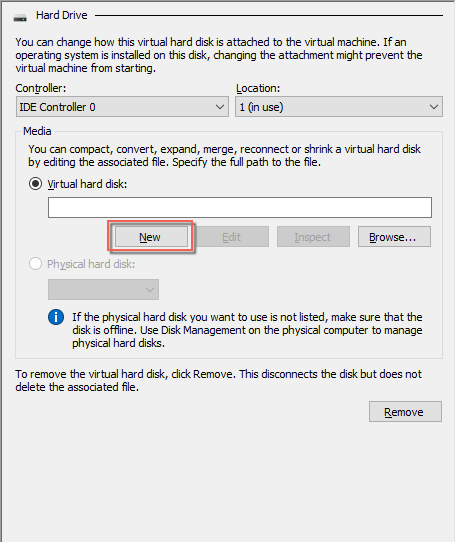
To extend the virtual disk, open the virtual machine properties and follow the steps below:
- Navigate to IDE Controller 0, select Hard drive and click Add

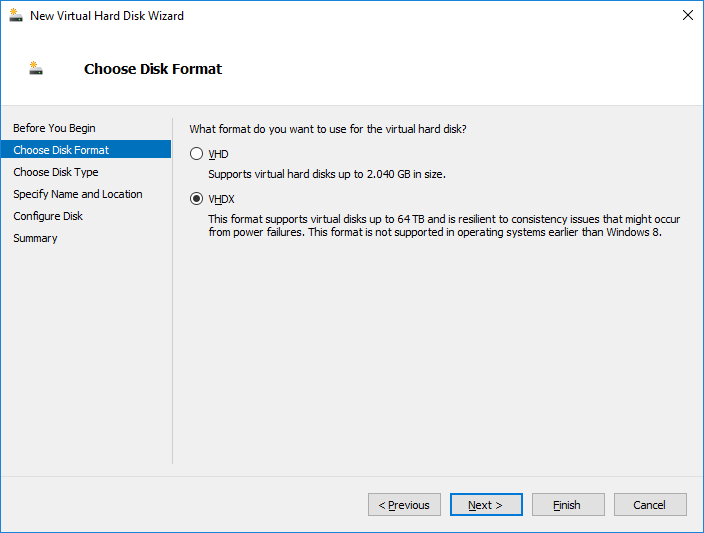
- Select New and finish the wizard:
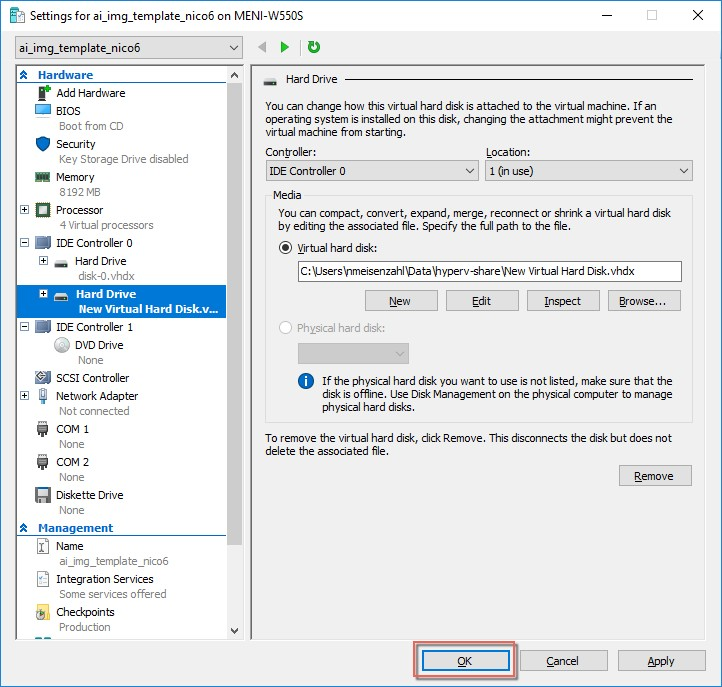
- After finishing the wizard click Ok to exit the Settings:
Please restart the virtual appliance after adding the new disk.
Enlarging the Partition in the ConnectionsExpert Appliance
- The easiest way to enlarge a partition in ConnectionsExpert is to use the installed partition manager GParted. Please launch it using the Applications menu (you can also start GParted from the Terminal with "sudo gparted"):
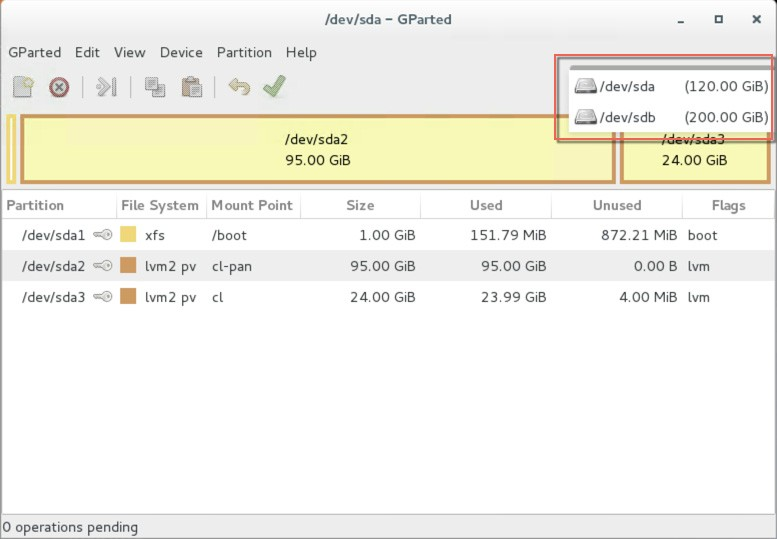
- Select the new physical disk:
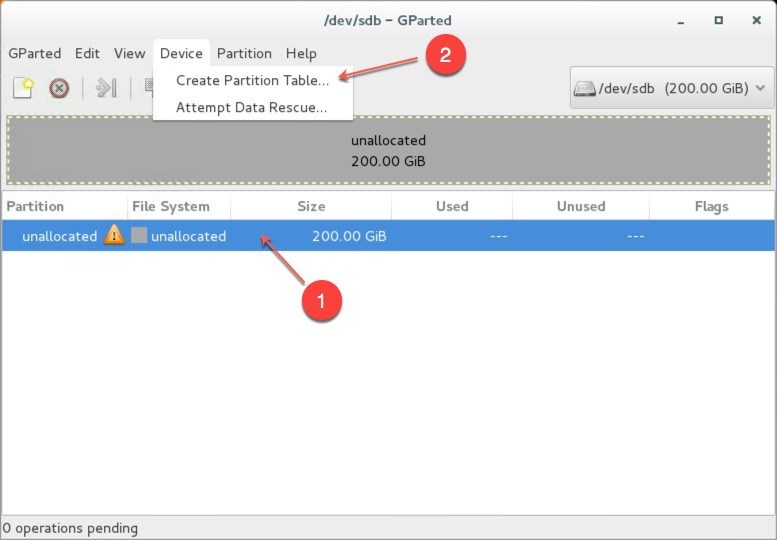
- Select the unallocated space, open the Device menu and on click on Create Partition Table:
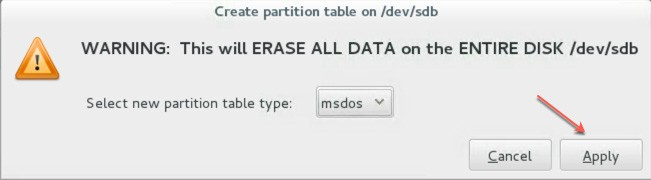
- Click on Apply in the warning:
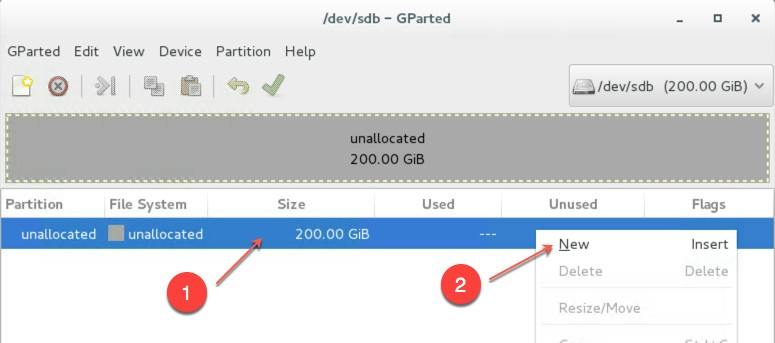
- Select the new unallocated space, right-click and select New:
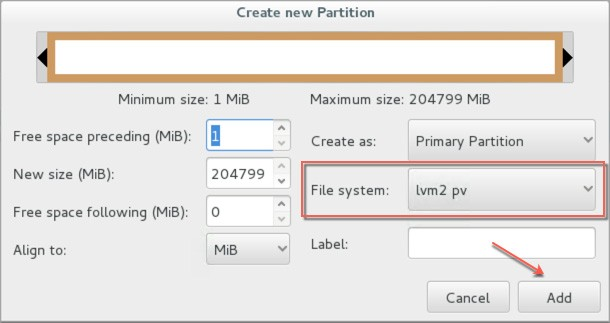
- From the Createas drop down menu, select PrimaryPartition and chose lvm2pv as File system (if needed, a Label can be defined):
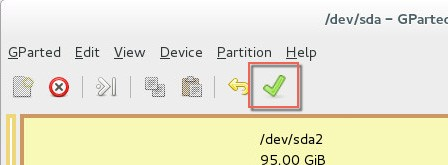
- Save your changes by clicking the apply button - also on the popup message
- Start the Logical Volumes Manager from the Applications menu
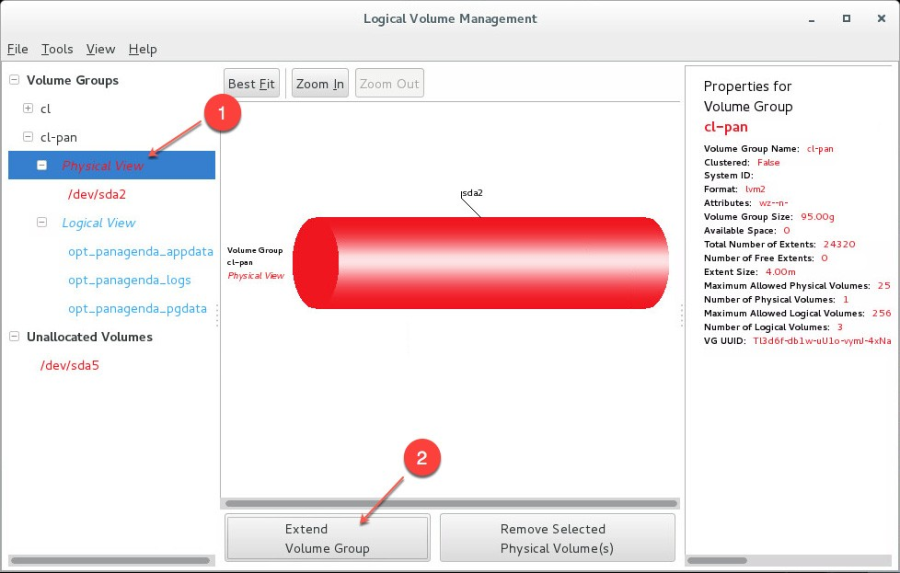
- Open the Logical View on the left hand side, select Physical View and click Extend VolumeGroup:
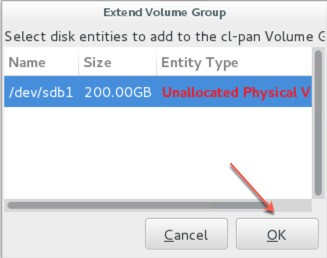
- Select your new volume and click OK:
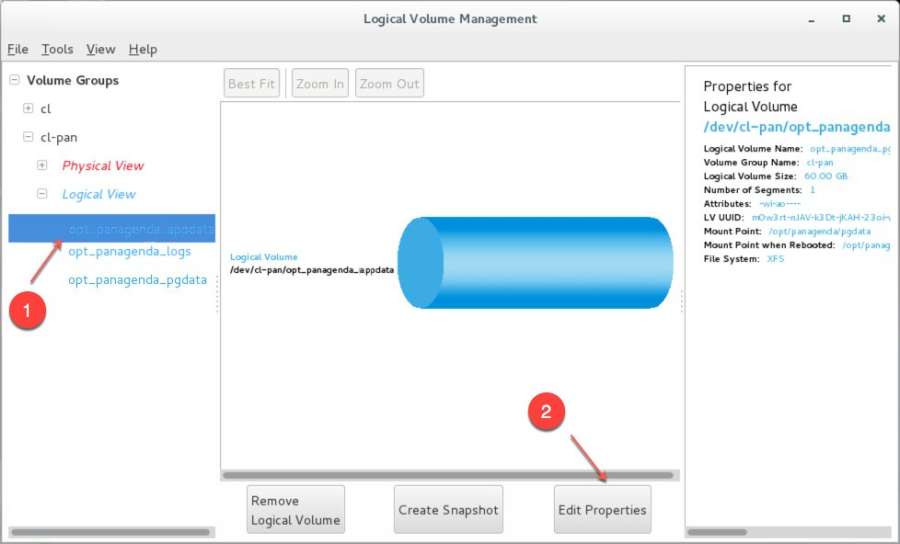
- After this, select the logical volume opt_panagenda_appdata:
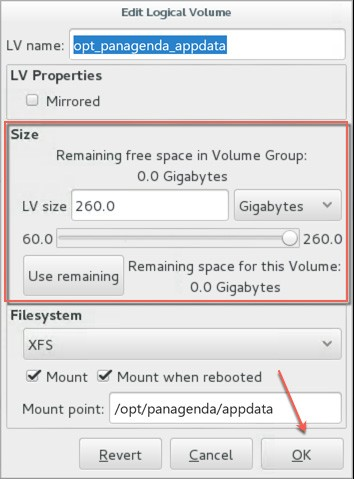
- Resize the logical volume as needed (initial dimensioning: 5MB x database instances - for more details, please refer to the Setup Guide):
 '
' - Select the logical volume opt_panagenda_pgdata (for more details on initial dimensioning, please refer to the Setup Guide):

- Resize the logical volume as needed (see step 12)
Tip
You can repeat this enlargement whenever you need more space.