Welcome Screen and IP Address
After starting up the appliance for the first time, you should be presented with a panagenda GreenLight welcome screen. If your network has a public DHCP server available, the system might already have acquired an IP address and will display the URL.
Use the shown IP address (interface URL) in your web browser to connect to the panagenda GreenLight web interface.
If DHCP is not available within your network or the panagenda GreenLight appliance did not acquire any IP address, you have to configure the panagenda GreenLight appliance Network Settings.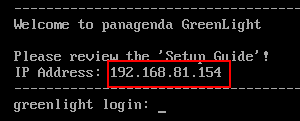
Appliance Login
GreenLight provides a console and a graphical user interface in order to configure operating system level settings like network, time and time zone settings.
Default login information:
- user "root" with password "config"
Console
After login, basic information, such as disk space, system time and IP address, are shown:

Graphical User Interface
There are two ways to use the GUI to configure your GreenLight appliance:
- LocalIn order to start the GUI locally, enter the command "startx"To start the GUI automatically when GreenLight is booted, please enter the following command: "systemctl set-default graphical.target"
- Remote Access via VNC. Enter vncserver on the server console and connect via vncviewer to the host: e.g. gl.acme.com:1 (:1 stands for the default port)
GUI Basics:

The Applications menu provides access to all required applications:

You can access all required applications by using the desktop icons, too.
To check an established internet connection, a web browser (Mozilla Firefox) is available on the panagenda GreenLight appliance.
You can use the terminal window to check if your TCP/IP connection is established, using Linux ping and ifconfig command. For more information about ping and ifconfig commands, type man ping or man ifconfig in the terminal console window.
panagenda GreenLight log files can be found within the /opt/panagenda/logs directory. The main log file (/opt/panagenda/logs/tomcat/greenlight.log) holds essential information about panagenda GreenLight runtime behavior. Use the Files application to navigate to these log files.
To check the panagenda GreenLight appliances system behavior, you can use the installed system monitor.
Network Settings
To change the IP address and DNS configuration please click on the Network icon. Select the Ethernet connection and click on Edit:


Go to the IPv4 Settings tab and select Manual from the Method drop down menu to configure the network settings as required:

Tip
If you configure "DNS Search domains", not full qualified names will also be resolved.
The appliance must be able to reach the monitored servers via a TCP/IP network and must be accessible through th web browser to access the panagenda GreenLight Web Interface.
To access the panagenda GreenLight Web Interface, you need to have access at least to the panagenda GreenLight appliance via TCP/IP, Port 80 (HTTP) and Port 443 (HTTPS).
When changing the host name (default is "GreenLight") in the Host Information application, please make sure to adapt the host alias properties for 127.0.1.1 in /etc/hosts. This can be done using the gedit application. It is recommended that both host name and full qualified domain name are entered here:

![]()
Time Zone Settings
Please check the time zone settings of the appliance, use the Time and Date application to adjust.
It is very important to adjust the appliance's time zone. Please reboot the appliance after changing the date/time settings as the web server and database system require a clean start with the new configuration.
CORS Setting
Please modify the following file and enter your GreenLight Server CORS config
- Open a console window and enter: vim /opt/panagenda/appdata/gl/config
- add: PANAGENDA_CORS_ALLOWED_ORIGINS=your_GL_URL
- example: PANAGENDA_CORS_ALLOWED_ORIGINS=https://gl-dev-01.panagenda.local
- Save/close by entering: hit ESC + :wq!
- enter: gl down
- enter: gl start