If for some reason you have installed and deployed MarvelClient but you're not receiving any client documents in MarvelClient Analyse, please check the following:
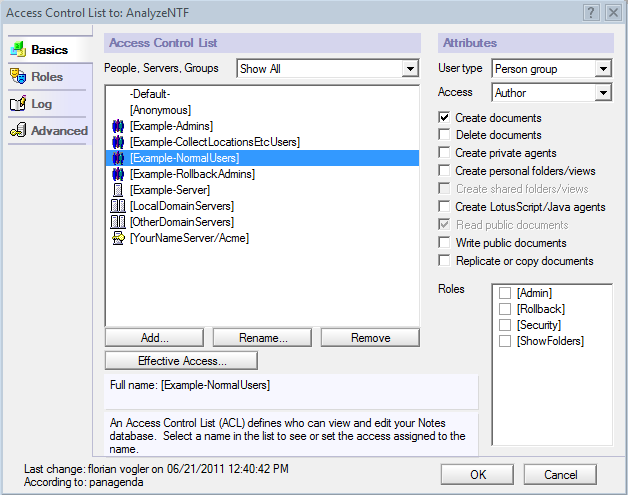
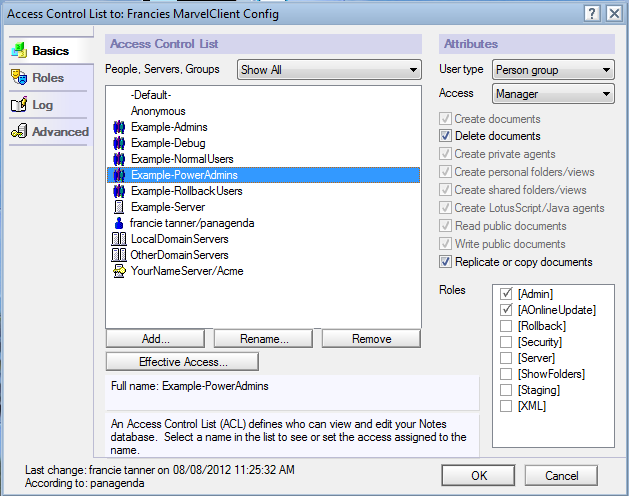
1. Check the ACL and roles of both your MC Config and MC Analyze database, which should look similar to the below with values in [brackets] being replaced with group or server names:
2. Next, check the location of your MarvelClient Config and Analyze databases and write down the server name and file path, such as cronus/panagenda - panagenda\panagenda.nsf and/or apps\mc_analyze.nsf
3. Then, open your "Set Path to MC Analyze (ini:MC_UploadDB)" action document in the MarvelClient Config database and look at the "Filename Incl. Directory" field.
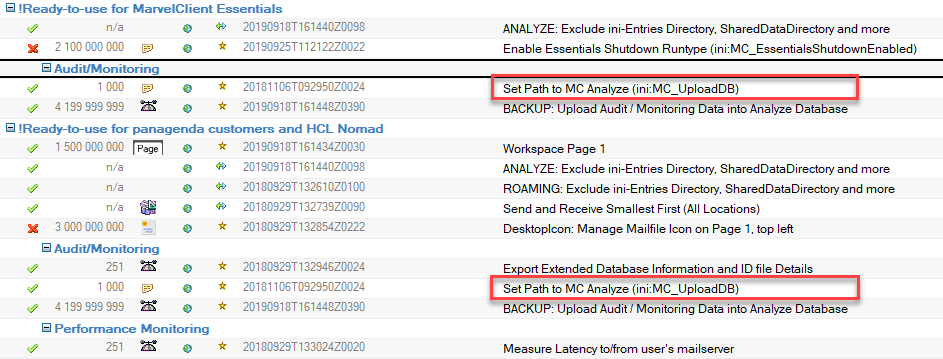
NOTE: The highlighted documents in above screenshot are the same = ONE document, just displayed in two different categories, so you only need edit ONE.

The field content showing "panagenda\mc_analyze.nsf" in above screenshot should match the path of your Analyze database noted in step 2 above. In other words, if your Analyze database is deployed to anything other than panagenda\mc_analyze.nsf then this field needs to be updated with your actual file path.
Next, open your "BACKUP: Upload Audit / Monitoring Data into Analyze Database" action document in the MarvelClient Config database and look at the "Server" field.
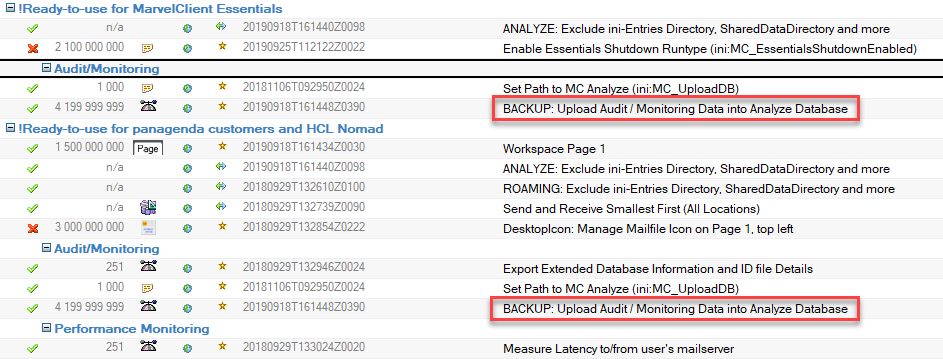
NOTE: The highlighted documents in above screenshot are the same = ONE document, just displayed in two different categories, so you only need edit ONE.
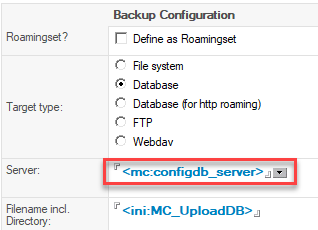
The server field shown above means that MarvelClient will look for the Analyze database in the path specified, on the same server the Config database is located. So if your Analyze database resides on a different server from your Config database, the "Server" field also needs to be updated. We don't often see customers deploy the Config database on a different server than the Analyze database, so this is rarely the case. If needed, however, you can simply enter a servername like "servername/certifier" into the field (without quotes).
4. Next, check the Notes.ini of a client that has MarvelClient deployed. The Notes.ini should have an entry for EXTMGR_ADDINS as well as one pointing to the location of your MarvelClient Config database via MC_DB=:
EXTMGR_ADDINS=mc.dll
or
EXTMGR_ADDINS=pmc.dll
MC_DB=NameOfYourTestServer!!directoryand\FilenameOfYourConfigurationDatabase.nsf
or MC_DB=%notes_homeserver%!!panagenda\panagenda.nsf
or no MC_DB entry at all, in which it defaults to %notes_homeserver%!!panagenda\panagenda.nsf
Server and file path are separated with a double exclamation mark. Server- and filename must match the server- and filename from step 2 above. Please note, that MC_DB supports the placeholder %notes_homeserver% which is dynamically replaced at runtime with the then current end users homeserver, for example: MC_DB=%notes_homeserver%!!panagenda\panagenda.nsf
5. Lastly, check your license document in your MarvelClient Config database to ensure that the certifier matches and that the license is not expired. To do this, open the License Updates view in the Administration section of your Config database and open the enabled document. 

The certifier field should match the /O= or /OU= that you are using and the "valid_until" field should contain a date that has not passed yet.
6. Please keep in mind that client uploads do require a restart of Notes so if you found a problem in any steps above, please restart Notes for the user and check the Analyze database again.
As always support@panagenda.com is here to help you if you have not located the problem in the above 5 steps.