Page History
The panagenda MarvelClient databases can be updated in two different ways, either via Online Update or Manually.
...
A. In the MarvelClient navigator go to Administration - \Online Update, which requires the ACL role [AOnlineUpdate].
B. Fill out the Online Update Page:
|  |
...
|
|

| Tip | ||
|---|---|---|
| ||
Release Notes can be found here as RSS feed: https://www.panagenda.com/kbase/createrssfeed.action?types=page&spaces=mc&title=panagenda+MC+Release+Notes&labelString=rn-mc&excludedSpaceKeys%3D&sort=modified&maxResults=10&timeSpan=5&showContent=true&confirm=Create+RSS+Feed |
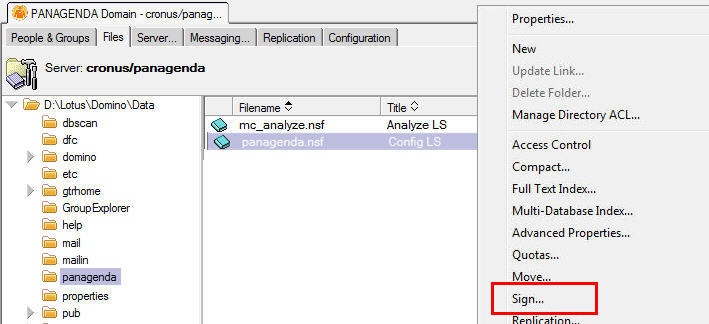
C. If you did not select for the Config database to be signed in step 5 7 above, then open your Admin client, navigate to the location of your MarvelClient databases and , right-click on the MarvelClient Config and Analyze database and select “Sign”. Then select your desired signing ID and sign all design documents. Ideal signing ID's are full access admin ID's which have rights IDs have the right to run agents on the server and are listed in user ECL's, as well as the MarvelClient ACL'shave access to both the MarvelClient Config and Analyze database.
D. For existing MarvelClient installations (NOT for MarvelClient Essentials), after each Online Update, check the "License Update" view to ensure that the latest document license is enabled. If a license change occurred since the last Online Update, it is possible that the enabled document is in fact NOT the most current, in which case the most current license will need to be enabled.
Note: the "Last modified" column contains the date/time of the license document, which is how the most current license can be recognized (the column is only visible with role [MCKST:Admin])
Online Update does not enable new or changed licenses automatically - except for when running your very first Online Update without any license document at all yet.
MarvelClient Essentials customers do not get a license document, unless they upgrade to a licensed version of MarvelClient.
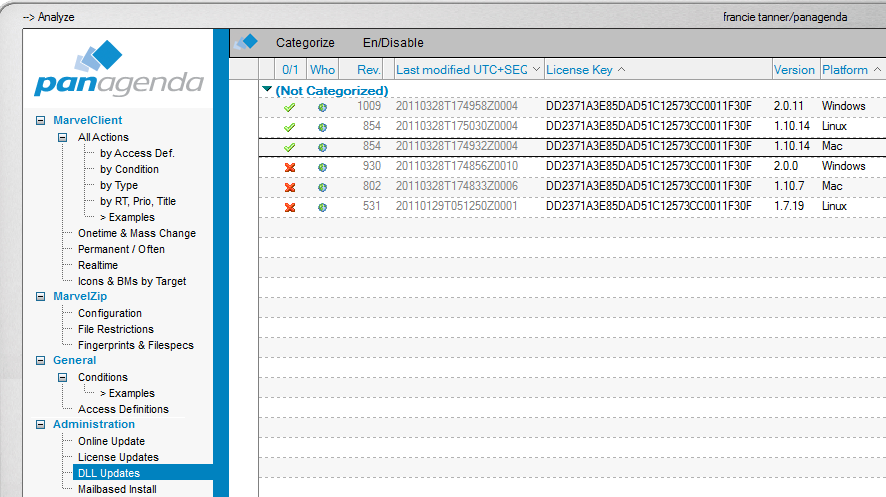
E. For existing MarvelClient installations, please also check the "DLL Updates" view as a newer DLL for Linux, Mac or Windows binary for e.g., Windows or Mac 64 Bit may have been dowloaded, in which case the new documents are DISabled by default. Enable them once you are ready to use the new DLL and be aware that all users will automatically update their DLL binary as they restart Lotus Notes.
Note that an automatic "DLL" update requires that users have write permissions in the directory where the "DLL" is to be updated, and that such an update requires TWO client restarts.
(at first client startup old DLL loads and downloads new DLL, upon second restart, the new DLL then runs).
In case an end user does not have write permissions to the directory of the old DLL, the DLL will not be downloaded.
F. Make sure that the Audit_All agent is enabled in the MC Analyze database and set to run regularly on new and modified documents. 
Optionally, you may also want to schedule the Cleanup agent.
IBM Notes. You may want to restrict new binaries on the Who tab for testing purposes first.
Also, don't forget to check the option "Always detach binary/"DLL" to Notes data directory" to ensure that updates also work for users for whom the binary has initially been deployed to the Notes program directory (as is the case for MarvelClient Essentials, too).
Note that a binary update requires TWO client restarts: At the next client start, the old binary loads and downloads the new binary. Upon the next client (re)start, the new binary is loaded.
Manual Update:
A. To manually update the MarvelClient Config and Analyze databases, download all files from http://update.panagenda.com/pub/panaweb.nsf/getlicenseinfo?openagent&key=LICENSEKEY and follow the instructions.instructions as shown on the resulting page.
For MarvelClient Essentials, use the following URL: http://update.panagenda.com/pub/panaweb.nsf/getlicenseinfo?openagent&key=MCEssentials
| Note |
|---|
Note: There is no need to download the license file for existing installations - unless your license changed since the last Online Update. |
B. Once all files are stored in the directory on your workstation, which is set as "Update directory" (see step B3 B4 above), run the Online Update while set to "Install prepared update" (see step B2 B3 above).
| Note |
|---|
Note: If you select "Install prepared update" (see step B2 B3 above) for a manual Update, the points 5 & 6 regarding the B6 (connection settings are ) is not relevant , - the rest of the process is the same as described above. |
...