Page History
The following steps will get you started with panagenda MarvelClient in just 20 minutes:
| Note |
|---|
Please note that panagenda MarvelClient is fully integrated into HCL Nomad Mobile (starting with version 1.0.4), so HCL Nomad Mobile does not require any client-side installation. |
The MarvelClient Install Wizard
- You may want to read through the System Requirements and Installation Types before installing panagenda MarvelClient - in general it's also a good idea to read through MarvelClient: Good to know.
To install the MarvelClient Databases on an
IBMHCL Domino server
or your Notes client, open the MarvelClient Installer database
and click on theInstall panagenda MarvelClient button.The MarvelClient Installer is included in the panagenda folder in IBM Domino 10. You can also download the Installer here.
If you want to perform a manual installation, please refer to performing a manual install of panagenda MarvelClient
:
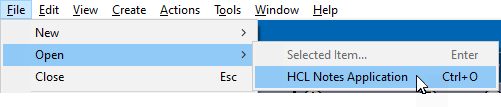
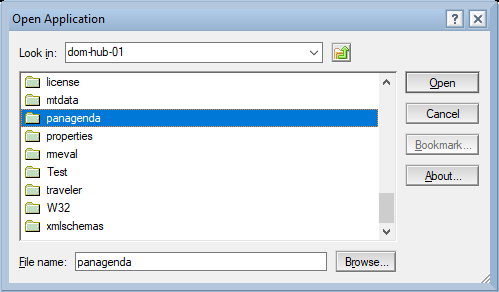
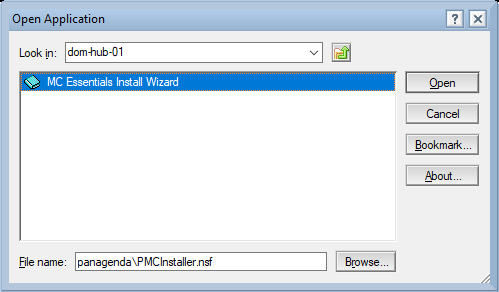
If you have a Domino 10.0.1 server or newer, select File\Open\HCL Notes Application in your Notes client > enter the servername of your Domino server > Open the panagenda folder > Open the MC Essentials Install Wizard:
- If you do not have a Domino server >= 10.0.1 yet, you can download the MarvelClient Multi-Edition Installer here.
You can simply download the Installer to your local Notes client and open it from there.
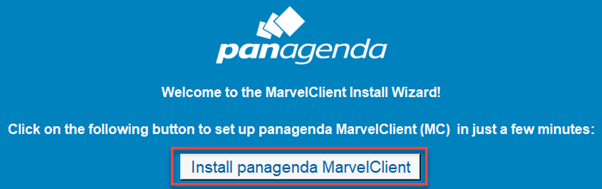
After opening the Installer, click on the "Install panagenda MarvelClient" button:
Just follow the instructions of the Install Wizard.
If you are a panagenda customerInfo If during installation you choose settings different from the default, take a note as you will need them again later on.
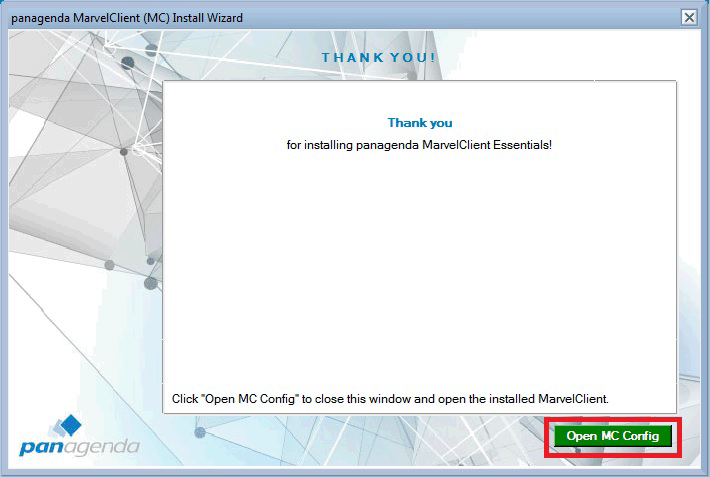
- Once your Installation has finished and you have clicked on "Open MC Config", please perform an Online Update, see Updating . For details see Updating the MarvelClient Config , and Analyze and Help Databases. For MarvelClient Essentials, this step is optional.
- Depending on your Notes client release(s), continue as follows:
For Notes client releases < 10
, install the MarvelClient binary on your local machine .0.1, rollout and enable the MarvelClient Essentials as described here:
Setting up your first IBM Notes Client with - .
- Restart the client (make sure that you
- For Notes client releases >= 10.0.1, but < 12.0, enable MarvelClient Essentials as follows: Special Option to enable but not deploy MarvelClient Essentials
- For Notes client release >= 12.0, simply enable MarvelClient Essentials.
- As soon as you restart any client with MarvelClient Essentials (make sure to also close any Admin and Designer clients) to upload your first document , if applicable), they will upload data into the MarvelClient Analyze database.
Note that the MarvelClient binary is already included in Notes release 10.
...